Chapter 05: Transition Effect
Create an effect for transitioning between scenes
Our game is functional, but the jump from the title screen to the game is very sudden. We can make it feel much more polished with a smooth transition instead of an instant cut.
Note
In the previous chapters, we focused on the shader development workflow.
- We set up a hot-reload system in Chapter 02,
- We set up a
Materialclass in Chapter 03, - We set up a debug UI using
ImGui.NETin Chapter 04.
All of this prior work is finally going to pay off! In this chapter, you will be able to leverage the hot-reload and debug UI to experiment with shader code in realtime without ever needing to restart your game. You can start the game, make changes to the shader, tweak shader parameters, all without needing to recompile your project.
In this chapter, we will dive into our first major pixel shader effect: a classic Screen Wipe. We will learn how to control an effect over the whole screen, how to create soft edges, and how to use textures to drive our shader logic to create all sorts of interesting patterns.
At the end of the chapter, you will have a screen transition effect like the one below.
| Figure 5-1: We will build this screen transition effect |
If you are following along with code, here is the code from the end of the previous chapter.
Sample Source
The full source for this tuturial can be located on the 3.8.5 branch of the main MonoGame.Samples repository
As shown below:
https://github.com/MonoGame/MonoGame.Samples/tree/3.8.5/Tutorials/2dShaders
The Scene Transition Effect
Screen wipes are the bread and butter of transitions, you see them everywhere from Presentations, to window washers and even games (ok, I made the middle one up). The basic principle is sound, control what you draw and use a pattern to only draw part of an image, this is a useful technique for almost anything in game development, so let us get started with what you came here for, BUILDING SHADERS.
Getting Started
Start by creating a new Sprite Effect from the MonoGame Content Builder Editor (using the "New Item" menu) in the folder called effects (organization is key for both content as well as code), and name it sceneTransitionEffect:
Note
Just use the name, if you add the extension .fx then you will get sceneTransitionEffect.fx.fx as the MGCB editor adds the extension automatically.
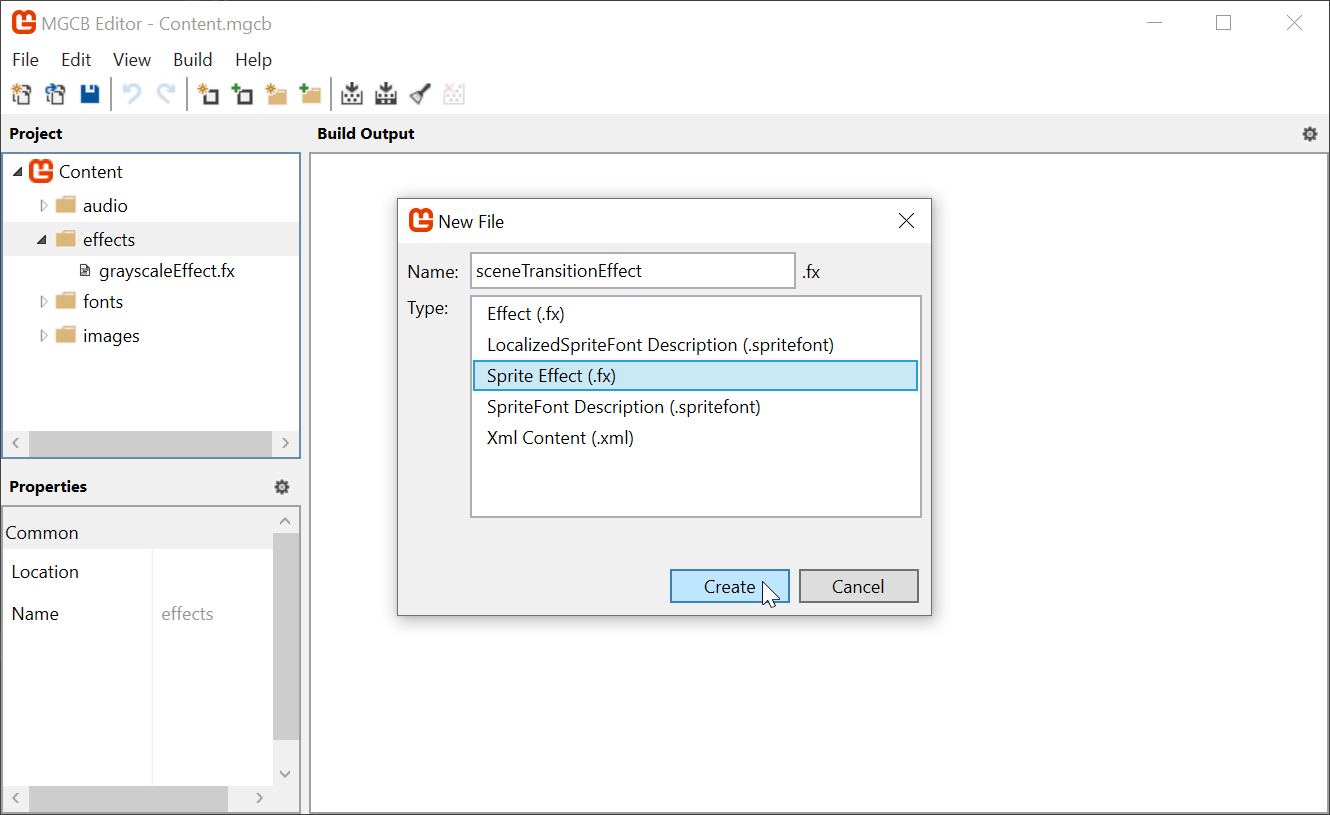 |
|---|
Figure 5-2: Create a new Sprite Effect |
Save and build the content project, just to be sure, and then switch back to your code editor to perform the following steps:
As the
Coreclass in theMonoGameLibraryproject has not implemented Materials previously, it will need theusingstatement to the library "content" features in order to be able to use theWatchContentextension we added in Chapter 3, so add a new using to the top of the class:using MonoGameLibrary.Content;Let us start by adding the following variable to the top of the
Coreclass to keep a static reference to the transition effect:/// <summary> /// The material that is used when changing scenes /// </summary> public static Material SceneTransitionMaterial { get; private set; }Add a new
LoadContentmethod (just before theUnloadContentmethod to make it easier to find), and load thesceneTransitionEffecteffect into aMaterial:protected override void LoadContent() { base.LoadContent(); SceneTransitionMaterial = Content.WatchMaterial("effects/sceneTransitionEffect"); }While we are developing the effect, we should also enable the debug UI framework we added earlier:
protected override void LoadContent()
{
    base.LoadContent();
    SceneTransitionMaterial = Content.WatchMaterial("effects/sceneTransitionEffect");
    SceneTransitionMaterial.IsDebugVisible = true;
}
To benefit from hot-reload, we need also need to update the effect in the
Core'sUpdate()loop:protected override void Update(GameTime gameTime) { // ... // Check if the scene transition material needs to be reloaded. SceneTransitionMaterial.Update(); base.Update(gameTime); }Finally, as we are providing a new "base" implementation of
LoadContent, we need to call theCore's version ofLoadContent()from theGame1class in theDungeonSlimeproject. In the previous tutorial, the method was left without calling the base method (because it was not implemented and did not need to):protected override void LoadContent() { // Allow the Core class to also load content. base.LoadContent(); // Load the background theme music. _themeSong = Content.Load<Song>("audio/theme"); }
If you run the game now, you should have a blank debug UI.
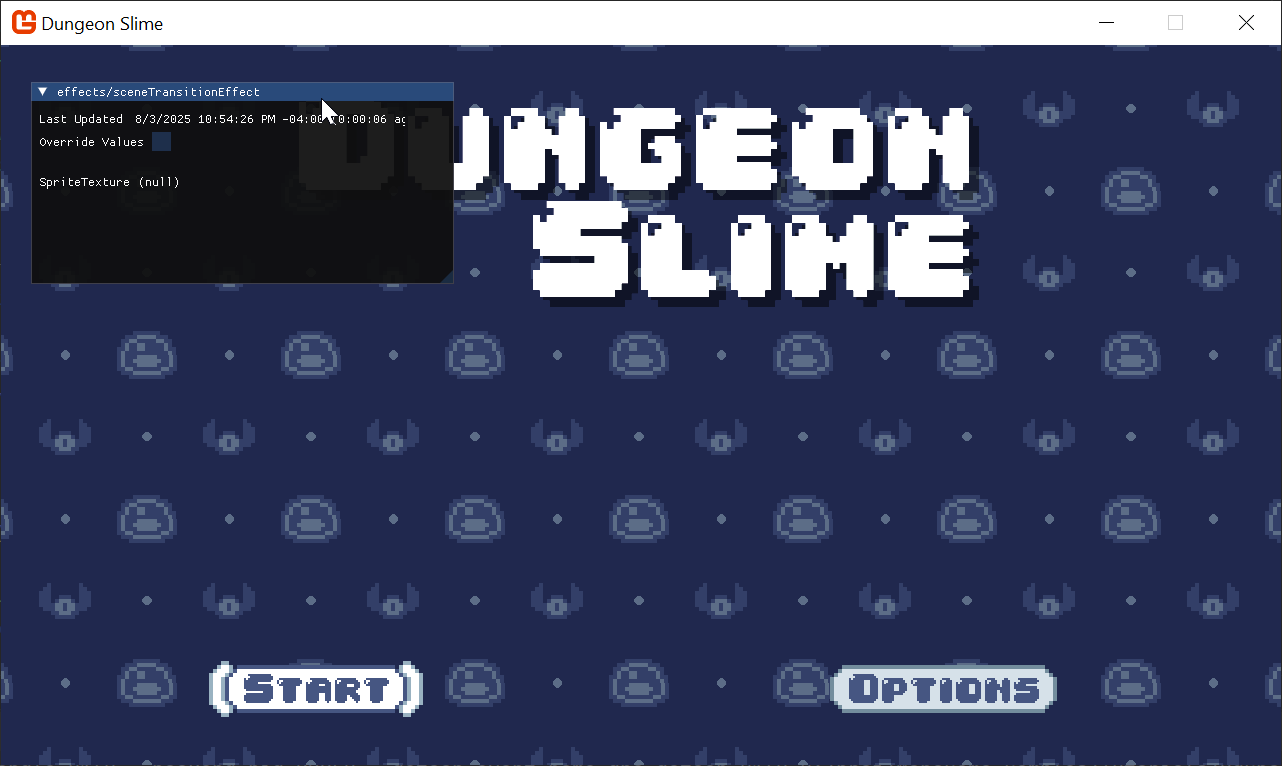 |
|---|
| Figure 5-3: A blank slate |
Rendering the Effect
Currently, the shader is compiling and loading into the game, but it is not being used yet. The scene transition needs to cover the whole screen, so we need to draw a sprite over the entire screen area with the new effect. To render a sprite over the entire screen area, we need a blank texture to use for the sprite. Add the following property to the Core class:
/// <summary>
/// Gets a runtime generated 1x1 pixel texture.
/// </summary>
public static Texture2D Pixel { get; private set; }
And initialize it in the Initialize() method:
protected override void Initialize()
{
    base.Initialize();
    // ...

    // Create a 1x1 white pixel texture for drawing quads.
    Pixel = new Texture2D(GraphicsDevice, 1, 1);
    Pixel.SetData(new Color[]{ Color.White });
}
Tip
The Pixel property is a texture we can re-use for many effects, and it is helpful to have for debugging purposes.
In the Core's Draw() method, use the SpriteBatch to draw a full screen sprite using the Pixel property. Make sure to put this code after the s_activeScene is drawn, because the scene transition effect should cover whatever was rendered previously in the current scene:
protected override void Draw(GameTime gameTime)
{
    // If there is an active scene, draw it.
    if (s_activeScene != null)
    {
        s_activeScene.Draw(gameTime);
    }

    // Draw the scene transition quad
    SpriteBatch.Begin(effect: SceneTransitionMaterial.Effect);
    SpriteBatch.Draw(Pixel, GraphicsDevice.Viewport.Bounds, Color.White);
    SpriteBatch.End();

    Material.DrawVisibleDebugUi(gameTime);

    base.Draw(gameTime);
}
If you run the game now, you will see a white background, because the Pixel sprite is rendering full screen on top of the entire game scene and GUM UI.
Note
We can still see the ImGui.NET debug UI because the debug UI is rendered after the current drawing the Pixel.
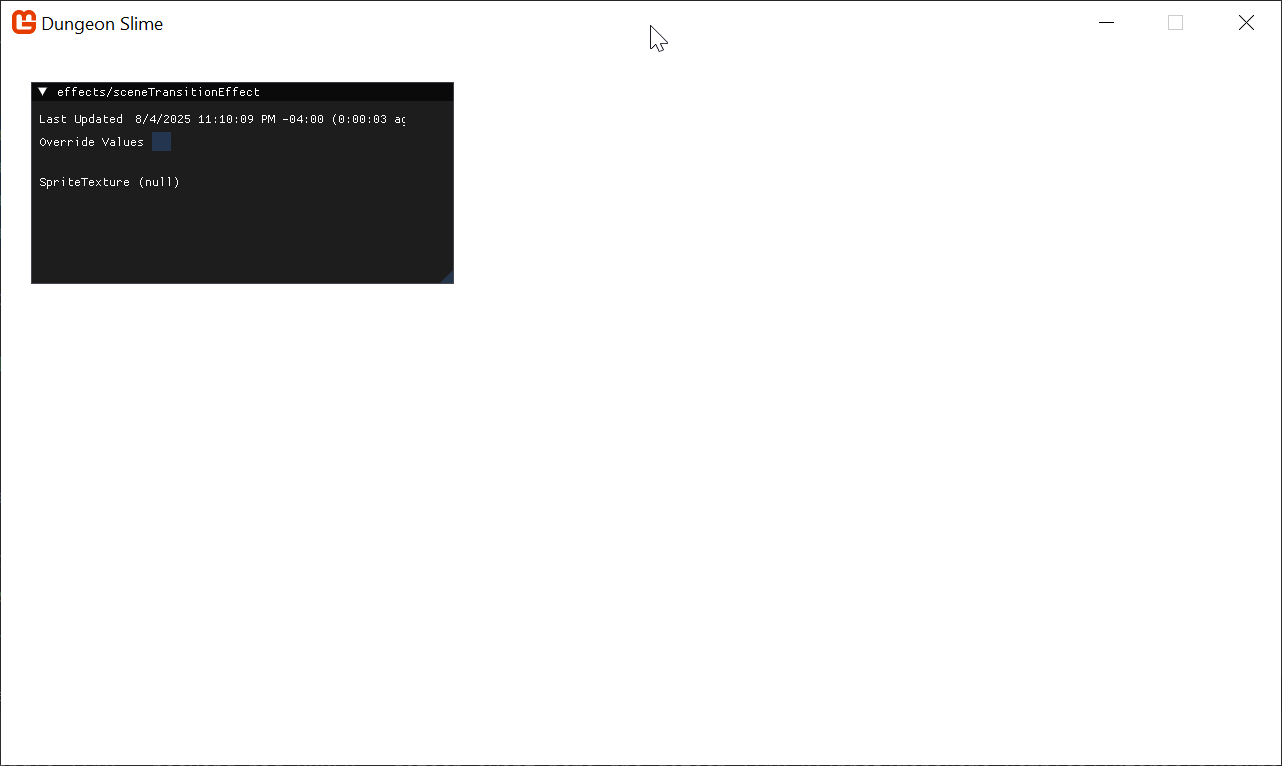 |
|---|
| Figure 5-4: The shader is being used to render a white full screen quad |
The Input
We need to be able to control how much of the screen is affected by the transition effect, the transition progress in effect.
Open the new sceneTransitionEffect.fx shader and add the following parameter to the shader:
#if OPENGL
#define SV_POSITION POSITION
#define VS_SHADERMODEL vs_3_0
#define PS_SHADERMODEL ps_3_0
#else
#define VS_SHADERMODEL vs_4_0_level_9_1
#define PS_SHADERMODEL ps_4_0_level_9_1
#endif

// ...

float Progress;

Texture2D SpriteTexture;

sampler2D SpriteTextureSampler = sampler_state {
    Texture = <SpriteTexture>;
};

// ...
And recall from the Material chapter, that unless the Progress parameter is actually used somehow in the calculation of the output of the shader, it will be stripped out of the final compilation of the shader for optimization. So, for now, we will make the shader return the Progress value using a red value color:
// ...

float4 MainPS(VertexShaderOutput input) : COLOR {
    return float4(Progress, 0, 0, 1);
}

// ...
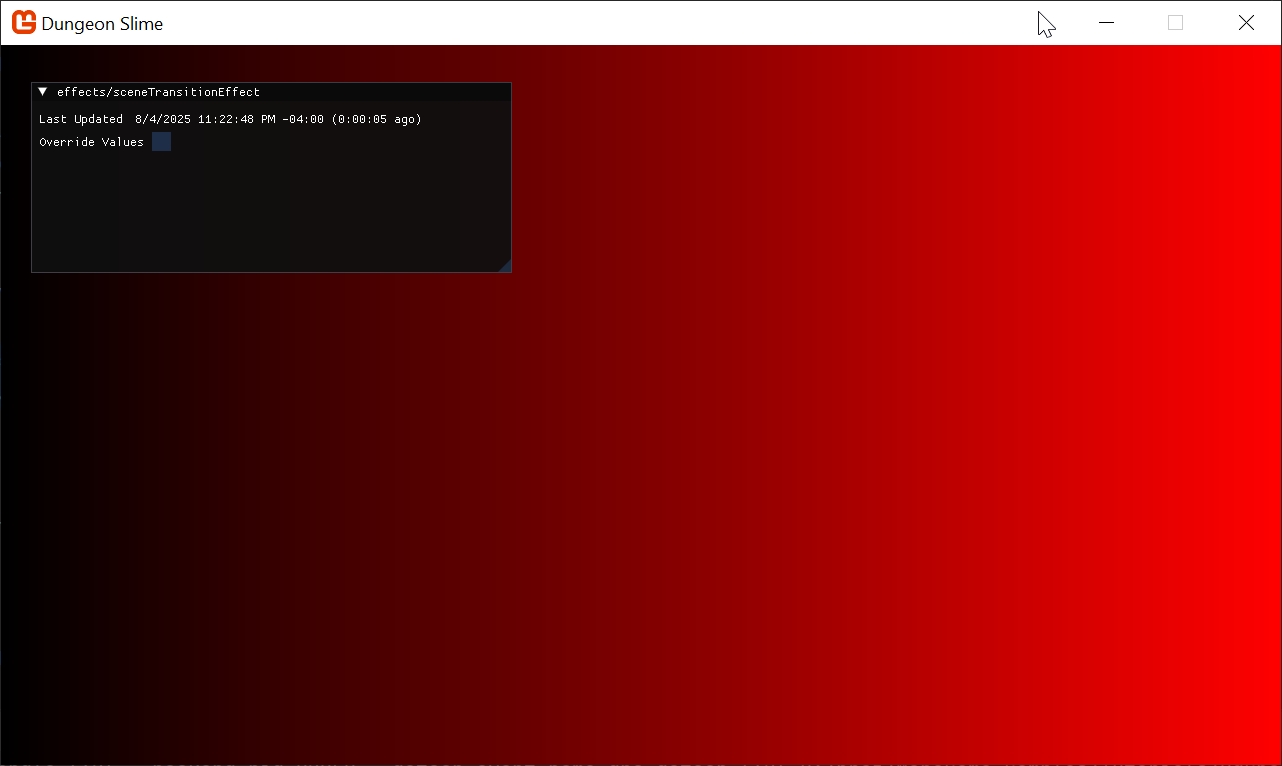
Now you can use the slider in the debug UI to visualize the Progress parameter as the red channel.
Warning
But wait, how does the game know to render a Progress slider?
Recall from Chapter 03: The Material Class's Setting Shader Parameters section that MonoGame's EffectParameterCollection knows about all of the compiled shader parameters The Debug UI we created in Chapter 04: Debug UI draws a slider for each parameter in the EffectParameterCollection. This means that as soon as a shader parameter is included in the compiled shader code, it will appear in the Debug UI without us needing to manually add or remove it.
As we add or remove shader parameters in the shader code, the hot reload system will compile the shader and reload it into the game, and the Debug UI will draw everything in the EffectParameterCollection.
Very cool and saves you a lot of effort when playing with values for configuring shaders!
| Figure 5-5: See the Progress parameter in the red value |
Note
The astute will also note that you do not even need to check the "Override Values" checkbox to affect the screen. This is simply because the game itself is not even trying to update the value (as it did previously with the greyscale saturation). It just works.
Coordinate Space
If we are making a screen wipe, then parts of the screen will be transitioning before other parts of the screen. The shader will affect the screen based on the coordinate of the pixel on the screen. For example, if we wanted to make a horizontal screen wipe, we would need to know the x-coordinate of each pixel. With the x-coordinate of a pixel, the shader could decide if that pixel should be shown or hidden based on the transition's progress parameter.
The shader already provides the x-coordinate (and y-coordinate) of each pixel in the input.TextureCoordinates structure.
Tip
input.TextureCoordinates are not actually the pixel coordinates
In this example, the input.TextureCoordinates represents pixel coordinates because the sprite is being drawn as a full screen quad. However, if the sprite was not taking up the entire screen, the texture coordinates would behave differently.
This topic will be discussed more later on.
Updating the shader with the following helps to visualize the x-coordinate of each pixel:
// ...

float4 MainPS(VertexShaderOutput input) : COLOR
{
    float2 uv = input.TextureCoordinates;
    return float4(uv.x, 0, 0, 1);
}

// ...
That results in this image, where the left edge has an x-coordinate of 0, it has no red value, and where the right edge has an x-coordinate of 1, the image is fully red. In the middle of the image, the red value interpolates between 0 and 1.
Warning
Where did the Progress slider go?
When the shader is compiled, the Progress parameter is being optimized out of the final compiled code because it was not being used in the final output of the shader in any way. The MonoGame shader compiler is good at optimizing away unused parameters, which is good because it helps the performance of your game. However, it can be confusing, because the Progress parameter appears to vanish from the shader.
It no longer appears in the EffectParameterCollection, so the debug UI has no way of knowing it exists to render it. You need to watch out for these things when building shaders and understand when something goes wrong, it is most certainly your own fault.
 |
|---|
| Figure 5-6: the x coordinate of each pixel represented in the red channel |
The same pattern holds true for the y-coordinate. Observe the following shader code putting the y-coordinate of each pixel in the green channel:
// ...

float4 MainPS(VertexShaderOutput input) : COLOR
{
    float2 uv = input.TextureCoordinates;
    return float4(0, uv.y, 0, 1);
}

// ...
As you can see, the top of the screen has a 0 value for the y-coordinate, and the bottom of the screen has a 1.
 |
|---|
| Figure 5-7: The y-coordinate of each pixel represented in the green channel |
When these shaders are combined, the resulting image is the classic UV texture coordinate space:
// ...

float4 MainPS(VertexShaderOutput input) : COLOR
{
    float2 uv = input.TextureCoordinates;
    return float4(uv.x, uv.y, 0, 1);
}

// ...
Tip
Remember that MonoGame uses the top of the image for "y = 0".
Other game engines treat the bottom of the image as "y = 0", but MonoGame (like XNA before it) uses the top of the image for where y is 0. There is a long winded reason for this, which we shall not go into here, except to simply state "Everyone has their own way of doing screen space coordinates", so you should always check.
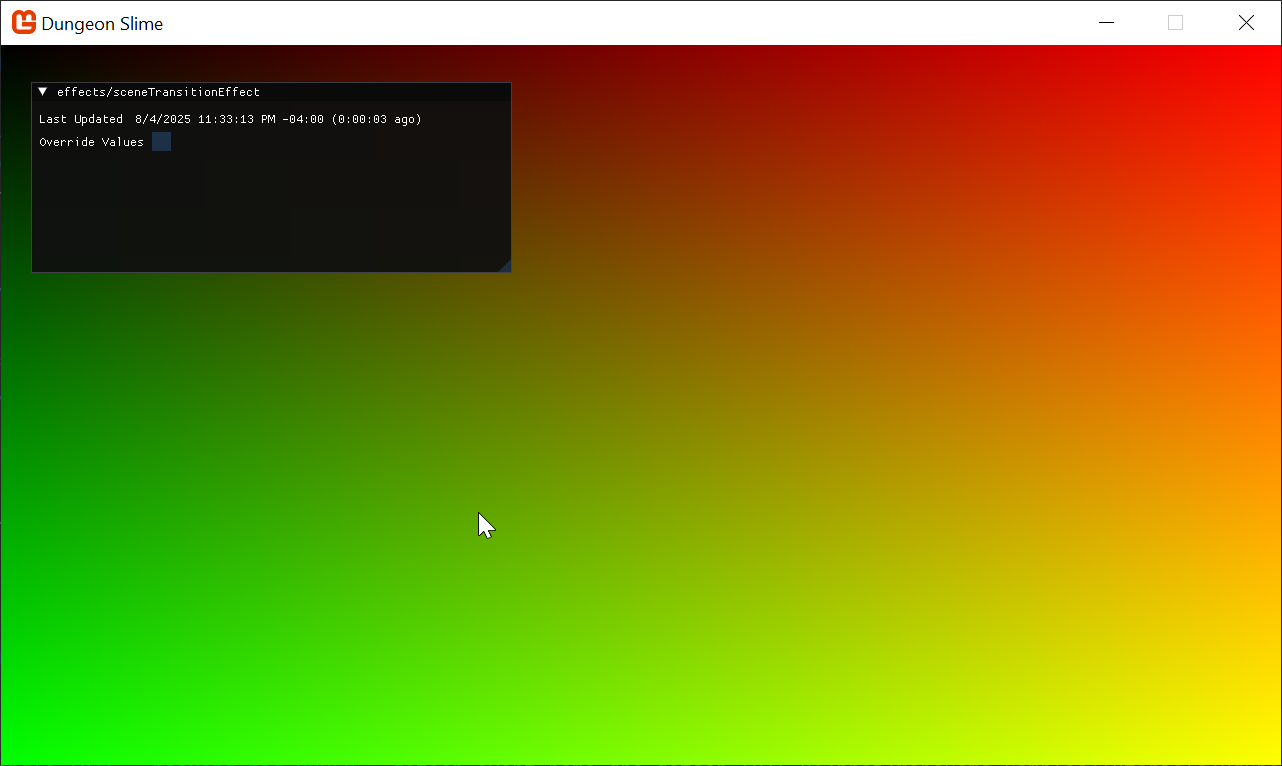 |
|---|
| Figure 5-8: x and y coordinates in the red and green channels |
Tip
Did you remember that we have a hot reload system running? This means you do not need to keep closing the game for every shader change! If you have been closing the game, stop doing that (although you might want to mute the audio to save your sanity)
Simple Horizontal Screen Wipe
Now that you have a visualization of the coordinate space, we can build some intuition for a screen wipe. To start, imagine creating a horizontal screen wipe, where the image turns to black from left to right. Remember that the x-coordinate goes from 0 on the left edge to 1 on the right edge. We can re-introduce the Progress parameter and compare the values. If the Progress parameter is greater than the x-coordinate, then that part of the image should transition.
In the following shader code, the blue channel of the final image indicates if that coordinate is in the transitioned state:
// ...

float4 MainPS(VertexShaderOutput input) : COLOR
{
    float2 uv = input.TextureCoordinates;
    float transitioned = Progress > uv.x;
    return float4(0, 0, transitioned, 1);
}

// ...
Use the slider to control the Progress parameter to see how the image changes.
| Figure 5-9: a simple horizontal screen wipe |
That looks pretty close to a screen wipe already! However, instead of using blue and black the effect should be using black and a transparent color. The following snippet of shader code puts the transitioned value in the alpha channel of the final color. When the alpha value is zero, the pixel fragment is drawn as invisible:
// ...

float4 MainPS(VertexShaderOutput input) : COLOR
{
    float2 uv = input.TextureCoordinates;
    float transitioned = Progress > uv.x;
    return float4(0, 0, 0, transitioned);
}

// ...
| Figure 5-10: A transparent screen wipe |
The transition works, but the edge between black and transparent is very hard, often in screen wipes the transition has a smooth or blurry edge. The reason the current shader has a hard edge is because the transitioned variable is either 0 or 1 depending on the outcome of the Progress > uv.x; expression.
Ideally, it would be nice to smooth the transitioned variable:
- Setting it to
0when theProgressis some small number like.05. - Setting it to
1when it is finished and theProgressis.1. - Then smoothly interpolate between
0to1in-between.
That way, it replaces the hard cut-off with a much smoother falloff/edge. We could write this by hand, but shader languages have a built in function called smoothstep which does essentially what we want.
Smoothstep
The smoothstep function takes 3 parameters:
- A
minvalue - A
maxvalue - And an input variable often called
x(ort(time) depending on who you ask).
The function returns 0 when the given x parameter is at or below the min value, and 1 when x is at or above the max value. Between these ranges it uses a smooth function to blend between the two bounds, min and max.
Tip
You can learn more about the smoothstep function in The Book Of Shaders
This would be the most basic way to adjust the code to use smoothstep, but right away, using a fixed .05 value should jump out as alarming:
// ...

float4 MainPS(VertexShaderOutput input) : COLOR
{
    float2 uv = input.TextureCoordinates;
    float transitioned = smoothstep(Progress, Progress + .05, uv.x);
    return float4(0, 0, 0, transitioned);
}

// ...
Using "magic numbers" in shader code is a dangerous pattern, because it is unclear if the value .05 is there for a mathematical reason, or just an aesthetic choice. At minimum, we should extract the value into a named variable, so that the reader of the code can attribute some sort of meaning to what .05 represents:
// ...

float4 MainPS(VertexShaderOutput input) : COLOR
{
    float2 uv = input.TextureCoordinates;
    float edgeWidth = .05;
    float transitioned = smoothstep(Progress, Progress + edgeWidth, uv.x);
    return float4(0, 0, 0, transitioned);
}

// ...
However, at this point, it would be better to extract the edgeWidth as a second shader parameter next to Progress:
// ...

float Progress;
float EdgeWidth;

// ...

float4 MainPS(VertexShaderOutput input) : COLOR
{
    float2 uv = input.TextureCoordinates;
    float transitioned = smoothstep(Progress, Progress + EdgeWidth, uv.x);
    return float4(0, 0, 0, transitioned);
}

// ...
Now you can control the edge width slider to see the smooth edge between transitioned and not.
| Figure 5-11: A smooth edge |
After we find an EdgeWidth value that looks good, we can set it in C# after the SceneTransitionMaterial is loaded in the Core class:
protected override void LoadContent()
{
    base.LoadContent();
    SceneTransitionMaterial = Content.WatchMaterial("effects/sceneTransitionEffect");
    SceneTransitionMaterial.SetParameter("EdgeWidth", .05f);
    SceneTransitionMaterial.IsDebugVisible = true;
}
Warning
Shader parameters do not use initializer expressions.
If you set a default expression for a shader parameter, like setting EdgeWidth=.05, MonoGame's shader compiler ignores the =.05 part.
You will always need to set this value from C#.
More Interesting Wipes
So far the shader has been using uv.x to create a horizontal screen wipe. It would be easy to use uv.y to create a vertical screen wipe:
// ...

float4 MainPS(VertexShaderOutput input) : COLOR
{
    float2 uv = input.TextureCoordinates;
    float transitioned = smoothstep(Progress, Progress + EdgeWidth, uv.y);
    return float4(0, 0, 0, transitioned);
}

// ...
| Figure 5-12: A vertical screen wipe |
But what if we wanted to create more complicated wipes that did not simply go in one direction?
So far, we have passed uv.x and uv.y along as the argument to compare against the Progress shader parameter, but we could use any value we wanted. If you pull out the expression into a separate variable, value, and experiment with some different mathematical functions.
For example, here is a wipe that comes in from the left and right towards the center:
// ...

float4 MainPS(VertexShaderOutput input) : COLOR {
    float2 uv = input.TextureCoordinates;
    float value = 1 - abs(.5 - uv.x) * 2;
    float transitioned = smoothstep(Progress, Progress + EdgeWidth, value);
    return float4(0, 0, 0, transitioned);
}

// ...
| Figure 5-13: A more interesting wipe |
That is cool, but if we wanted an even more interesting wipe, the math would start to become challenging. In the final effect, it would also be nice to change the type of wipe dynamically from the game, and changing entire shader functions, or writing completely separate shader effects would be very cumbersome, instead, we can build a more generalized approach without the need to write ever increasing complex mathematical functions to encode the wipe's progress.
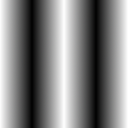
To build intuition, we start by visualizing just the value that is compared against the Progress parameter:
// ...

float4 MainPS(VertexShaderOutput input) : COLOR {
    float2 uv = input.TextureCoordinates;
    float value = 1 - abs(.5 - uv.x) * 2;
    return float4(value, value, value, 1);
}

// ...
 |
|---|
| Figure 5-14: Just the value for the center wipe |
Note
Yes, we have lost the Progress parameter for the moment, it will return later.
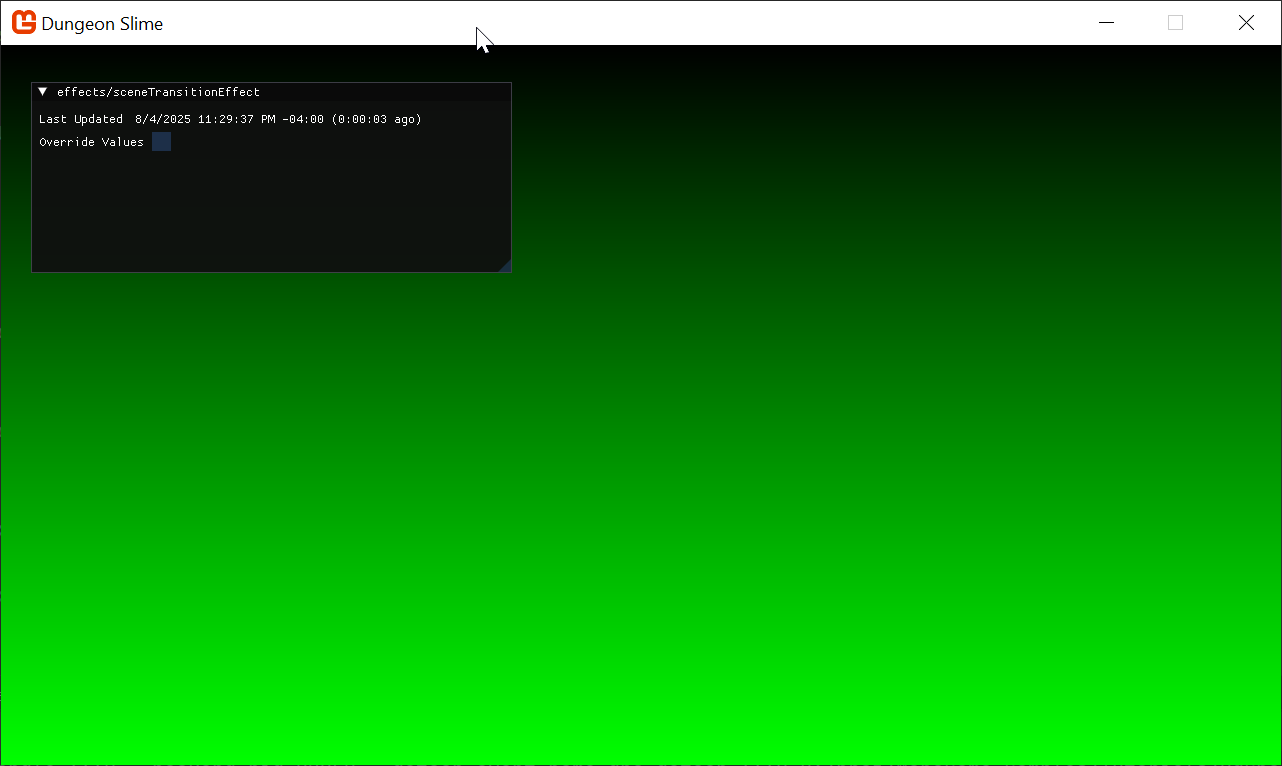
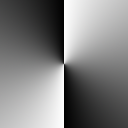
The display is not very interesting in of itself, but it does convey meaning of the transition effect will render later. The darker areas of the image are going to transition sooner than the brighter areas, and the brightest areas will be the last areas to transition when the Progress parameter is set all the way to 1. At the end of the day, the image is just a grayscale gradient.
You could imagine other grayscale gradient images. In fact, there is a fantastic pack of free gradient images made by Screaming Brain Studios on opengameart.org. Here are few samples,
 |
 |
 |
 |
|---|---|---|---|
| Figure 5-15: A ripple gradient | Figure 5-16: An angled gradient | Figure 5-17: A concave gradient | Figure 5-18: A radial gradient |
Theoretically, it is possible to derive mathematical expressions that would result in those exact grayscale gradient images, but given that we have the images already, we could just change the transition shader to read from the texture given the pixel's coordinate.
Right-click and download (save as) those files and add them to your MonoGame content into the Content/images folder (named as per the Content.Load methods shown below, by default they should already be named appropriately).
Note
Also remember to add them to your Content project and build it to ensure they are included
We will store these texture references in the
Coreclass as astaticproperty, similar to how theSceneTransitionMaterialis already being kept:/// <summary> /// A set of grayscale gradient textures to use as transition guides /// </summary> public static List<Texture2D> SceneTransitionTextures { get; private set; }Adding the required collections using statement we need for using the
Listtype:using System.Collections.Generic;In the
Core'sLoadContent()method, load the new images:protected override void LoadContent() { base.LoadContent(); SceneTransitionMaterial = Content.WatchMaterial("effects/sceneTransitionEffect"); SceneTransitionMaterial.SetParameter("EdgeWidth", .05f); SceneTransitionMaterial.IsDebugVisible = true; SceneTransitionTextures = new List<Texture2D>(); SceneTransitionTextures.Add(Content.Load<Texture2D>("images/angled")); SceneTransitionTextures.Add(Content.Load<Texture2D>("images/concave")); SceneTransitionTextures.Add(Content.Load<Texture2D>("images/radial")); SceneTransitionTextures.Add(Content.Load<Texture2D>("images/ripple")); }Instead of using the
Pixeldebug image to draw theSceneTransitionMaterial, we will use one of these new textures:protected override void Draw(GameTime gameTime) { // If there is an active scene, draw it. if (s_activeScene != null) { s_activeScene.Draw(gameTime); } // Draw the scene transition quad SpriteBatch.Begin(effect: SceneTransitionMaterial.Effect); SpriteBatch.Draw(SceneTransitionTextures[1], GraphicsDevice.Viewport.Bounds, Color.White); SpriteBatch.End(); Material.DrawVisibleDebugUi(gameTime); base.Draw(gameTime); }In the shader, we read the texture data at the given
uvcoordinate by using thetex2Dfunction. Modify the shader so that thevalueis only using the red-channel of the given texture:// ... float4 MainPS(VertexShaderOutput input) : COLOR { float2 uv = input.TextureCoordinates; float value = tex2D(SpriteTextureSampler, uv).r; return float4(value, value, value, 1); } // ...Note
Note we did not need to add a "Texture" parameter because the default MonoGame shader effect already comes with a default "main" texture. But if you wanted more textures, you would need to add them yourselves and
Setthe parameters in C#.Since the code above is referencing the
concaveimage, the result looks like this,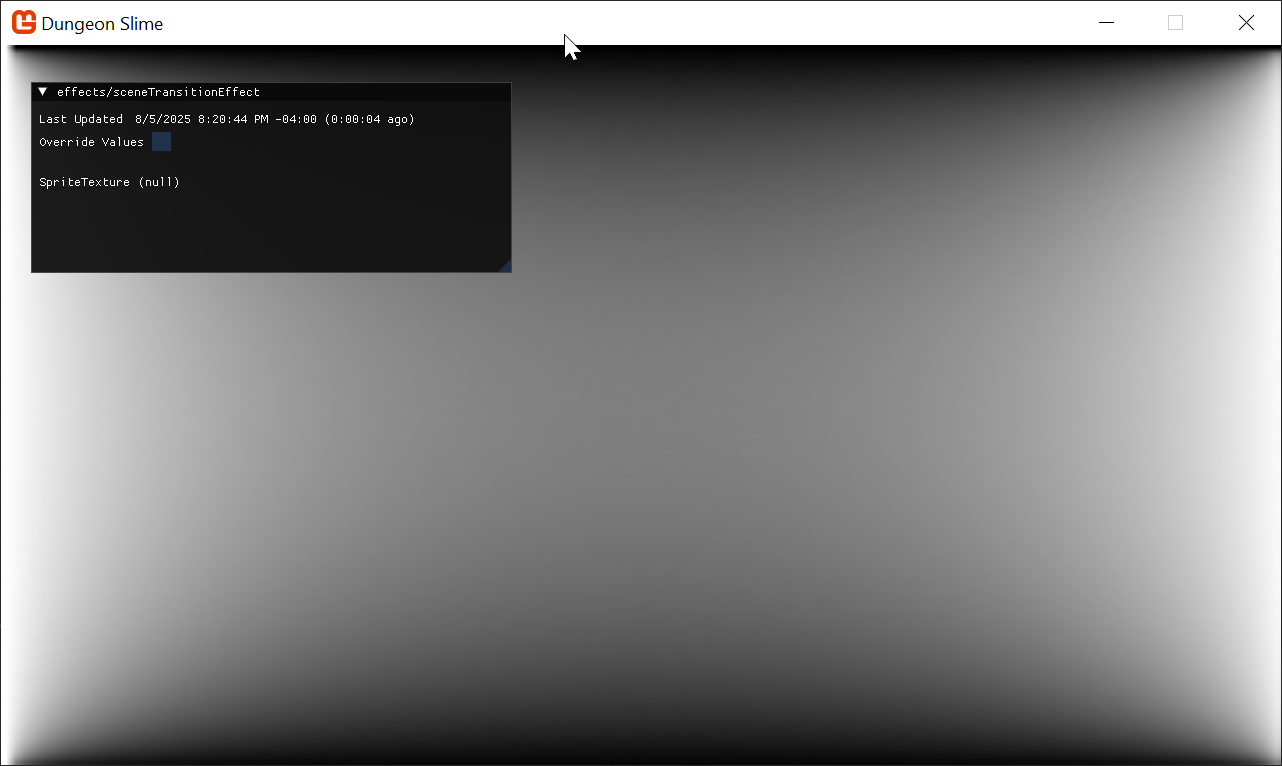
Figure 5-19: The concave value for a wipe Note
If you do not see any change, it is likely you have not added the downloaded images to the MGCB content project. By doing so you will also have to restart the project as we are ONLY watching the shader files and ignoring other changes.
Watch out you do not leave any old terminal windows running the watch in the background...
Now, modify the shader to use the
Progressparameter instead of just returning thevalue:// ... float4 MainPS(VertexShaderOutput input) : COLOR { float2 uv = input.TextureCoordinates; float value = tex2D(SpriteTextureSampler, uv).r; float transitioned = smoothstep(Progress, Progress + EdgeWidth, value); return float4(0, 0, 0, transitioned); } // ...As you play with the
Progressparameter slide, you can see the more interesting wipe pattern.Figure 5-20: The concave wipe in action Tip
Make sure not to make the "edge" value too large or it will never fully transition, because your "buffer" is too large.
Now it is as easy as changing the texture being used to draw the scene transition to completely change the wipe pattern.
Try playing around with the other textures, or make one of your own.
Controlling the Effect
So far we have implemented a transition effect that wipes a black-out across the screen, but nothing triggers the effect automatically when the scene actually changes. In this section, we will create some C# code to control the shader parameter programmatically.
We will create a new class called SceneTransition that holds all the data for an active scene transition.
Create a new
SceneTransition.csscript in theMonoGameLibrary/Scenesfolder and use the following content:using System; using Microsoft.Xna.Framework; namespace MonoGameLibrary.Scenes; public class SceneTransition { public DateTimeOffset StartTime; public TimeSpan Duration; /// <summary> /// true when the transition is progressing from 0 to 1. /// false when the transition is progressing from 1 to 0. /// </summary> public bool IsForwards; /// <summary> /// The index into the <see cref="Core.SceneTransitionTextures"/> /// </summary> public int TextureIndex; /// <summary> /// The 0 to 1 value representing the progress of the transition. /// </summary> public float ProgressRatio => MathHelper.Clamp((float)(EndTime - DateTimeOffset.Now).TotalMilliseconds / (float)Duration.TotalMilliseconds, 0, 1); public float DirectionalRatio => IsForwards ? 1 - ProgressRatio : ProgressRatio; public DateTimeOffset EndTime => StartTime + Duration; public bool IsComplete => DateTimeOffset.Now >= EndTime; }Then add the following
staticmethods to the newSceneTransitionclass:/// <summary> /// Create a new transition /// </summary> /// <param name="durationMs"> /// how long will the transition last in milliseconds? /// </param> /// <param name="isForwards"> /// should the transition be animating the Progress parameter from 0 to 1, or 1 to 0? /// </param> /// <returns></returns> public static SceneTransition Create(int durationMs, bool isForwards) { return new SceneTransition { Duration = TimeSpan.FromMilliseconds(durationMs), StartTime = DateTimeOffset.Now, TextureIndex = Random.Shared.Next(), IsForwards = isForwards }; } public static SceneTransition Open(int durationMs) => Create(durationMs, true); public static SceneTransition Close(int durationMs) => Create(durationMs, false);Switching back over to the
Coreclass, we need to add a newstaticproperty to hold all the possible transitions for the game:/// <summary> /// The current transition between scenes /// </summary> public static SceneTransition SceneTransition { get; protected set; } = SceneTransition.Open(1000);We need to ensure that anytime the
Coreclass changes scene it should also create a new closing transition:public static void ChangeScene(Scene next) { // Only set the next scene value if it is not the same // instance as the currently active scene. if (s_activeScene != next) { s_nextScene = next; SceneTransition = SceneTransition.Close(250); } }And when the effect starts the
TransitionScene()method, it should create an open transition:private static void TransitionScene() { SceneTransition = SceneTransition.Open(500); // ... }Then we need to actually set the
Progressshader parameter given the current scene transition value. In theUpdate()method:protected override void Update(GameTime gameTime) { // ... // Check if the scene transition material needs to be reloaded. SceneTransitionMaterial.SetParameter("Progress", SceneTransition.DirectionalRatio); SceneTransitionMaterial.Update(); base.Update(gameTime); }Finally, the scene material needs to be drawn with the right texture:
protected override void Draw(GameTime gameTime)
{
    // If there is an active scene, draw it.
    if (s_activeScene != null)
    {
        s_activeScene.Draw(gameTime);
    }

    // Draw the scene transition quad
    SpriteBatch.Begin(effect: SceneTransitionMaterial.Effect);
    SpriteBatch.Draw(SceneTransitionTextures[SceneTransition.TextureIndex % SceneTransitionTextures.Count], GraphicsDevice.Viewport.Bounds, Color.White);
    SpriteBatch.End();

    Material.DrawVisibleDebugUi(gameTime);

    base.Draw(gameTime);
}
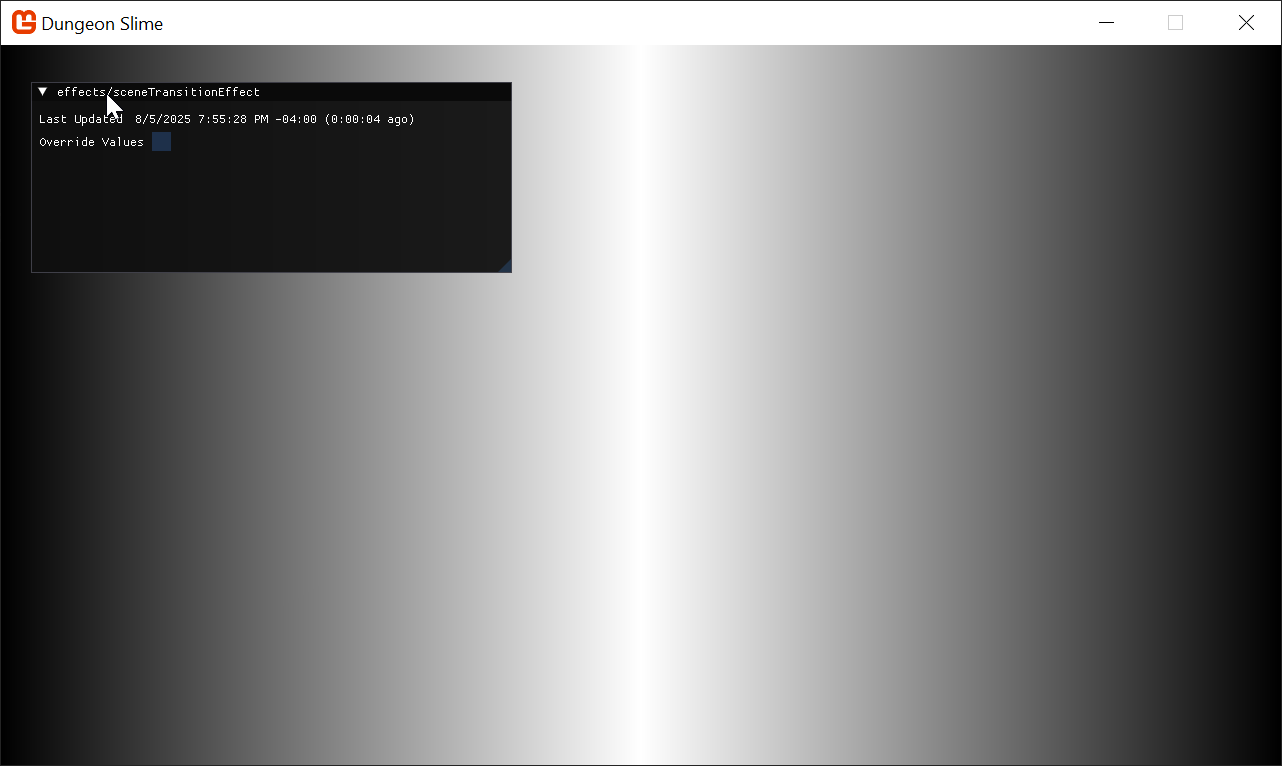
When you run the game and change between scenes and you will see a random arrangement of screen wipes!
| Figure 5-21: the shader is done! |
Shared Content
The shader looks great! But organizationally, it feels odd that the Material loads a shader effect that is not part of the MonoGameLibrary project. If the code is ever used in another project, it would be clunky to need to copy individual pieces of shader content out from the DungeonSlime game just so that the MonoGameLibrary project can work in a new project.
Important
As we need to work with dotnet tools, specifically the MGCB editor, the dotnet-tools.json (located in a .config folder) needs to be more accessible to the project as it is currently located in the DungeonSlime project folder, for the MonoGameLibrary to be able to consume it for the MGCB editor, it needs moving to the ROOT of the project folder.
Move the .config folder from the DungeonSlime folder up to the solution root. (where both the DungeonSlime and MonoGameLibrary live)
As a rule, the dotnet tools .config folder should ALWAYS be in your project root, especially if you are working with multi-project/platform projects.
To solve this problem, we will introduce a second .mgcb file in the MonoGameLibrary project.
(If you have not already) Move the
.configfolder from theDungeonSlimefolder up to the root project. Both DungeonSlime and the MonoGameLibrary needs to share the tools configuration.Note
As a rule, unless there is a specific reason not to, there should only be a single
.configconfiguration folder in your project, preferably in the root.Create a new folder called
SharedContentin the MonoGameLibrary project.Open the "MGCB Editor" and create a new blank
.mgcbfilefile -> New..in that directory calledSharedContent.mgcb.Add new folders called "effects" and "images" in the editor.
Right-Click on the "effects" folder and use "Add -> Existing Item..", then select the
sceneTransitionEffect.fxfrom the original DungeonSlime/Content/effects folder. Select "Copy" when asked.Right-Click on the "images" folder and use "Add -> Existing Item..", then select the transition images from the original DungeonSlime/Content/images folder. Select "Copy" when asked.
Note
Make sure you SAVE before exiting the MGCB editor, otherwise your content configuration may be lost. It is just good practice.
This gives you a new dedicated Content project for just the MonoGameLibrary project.
Important
Remember to remove the old files from the original DungeonSlime Content project and folder, to avoid duplication as these will no longer be used. (delete files and then "exclude" them in the MGCB editor for the original mgcb content)
In order for the DungeonSlime project to load the new Content Project, we need to make a few changes.
In the
DungeonSlime.csprojfile, add the followingMonoGameContentReference, this enables it to includemgcbfiles from both projects:<Project Sdk="Microsoft.NET.Sdk"> <!-- ... --> <ItemGroup> <MonoGameContentReference Include="**/*.mgcb;../MonoGameLibrary/**/*.mgcb" /> </ItemGroup> <!-- ... --> </Project>Also, in order for the shader hot-reload to work with the shared content, modify the
Watchelement to look like this:<ItemGroup Condition="'$(OnlyWatchContentFiles)'=='true'"> <!-- Adds .fx files to the `dotnet watch`'s file scope --> <Watch Include="../**/*.fx;" /> <!-- Removes the .cs files from `dotnet watch`'s compile scope --> <Compile Update="**/*.cs" Watch="false" /> </ItemGroup>Next, the existing
ContentManagerinstance in theCoreclass will only load content from the /Content folder, which will not include thesceneTransitionEffect.fxfile, because it is stored in the /SharedContent folder. For this tutorial, we will create a secondContentManagerin theCoreclass calledSharedContentwhich will be configured to only load content from the /SharedContent folder.Add the following property next to the existing
Contentproperty in theCore.csfile:/// <summary> /// Gets the content manager that can load global assets from the SharedContent folder. /// </summary> public static ContentManager SharedContent { get; private set; }Then you will need to set the new
SharedContentin theCoreconstructor, next to where the existingContentproperty is being set:public Core(string title, int width, int height, bool fullScreen) { // ... // Set the core's content manager to a reference of hte base Game's // content manager. Content = base.Content; // Set the root directory for content Content.RootDirectory = "Content"; // Set the core's shared content manager, pointing to the SharedContent folder. SharedContent = new ContentManager(Services, "SharedContent"); // ... }Finally, use the
SharedContentinstead ofContentto load all the content, replacing theLoadContent()method with the following:protected override void LoadContent() { base.LoadContent(); SceneTransitionMaterial = SharedContent.WatchMaterial("effects/sceneTransitionEffect"); SceneTransitionMaterial.SetParameter("EdgeWidth", .05f); SceneTransitionMaterial.IsDebugVisible = true; SceneTransitionTextures = new List<Texture2D>(); SceneTransitionTextures.Add(SharedContent.Load<Texture2D>("images/angled")); SceneTransitionTextures.Add(SharedContent.Load<Texture2D>("images/concave")); SceneTransitionTextures.Add(SharedContent.Load<Texture2D>("images/radial")); SceneTransitionTextures.Add(SharedContent.Load<Texture2D>("images/ripple")); }
Note
If you get build failures, then most likely you forgot to also remove the files that were moved from Content to SharedContent, FROM THE MGCB configuration (.mgcb). Just removing the files is not enough!
Conclusion
Our game is already starting to feel more polished with this new transition effect. In this chapter, you accomplished the following:
- Drew a full-screen quad to act as a canvas for a post-processing effect.
- Used UV coordinates and the
smoothstepfunction to create a soft-edged wipe. - Switched to a texture-based approach to drive the wipe logic with complex patterns.
- Created a
SceneTransitionclass to control the effect programmatically. - Refactored shared content into its own content project.
This was our first deep dive into pixel shaders, and we have created a very flexible system. In the next chapter, we will keep the momentum going by tackling another popular and powerful shader: a color-swapping effect.
You can find the complete code sample for this chapter - here.
Continue to the next chapter, Chapter 06: Color Swap Effect