Chapter 06: Color Swap Effect
Create a shader to change the colors of the game
In this chapter we will create a powerful color‑swapping effect. We will learn a common and flexible technique that uses textures as look‑up tables (LUTs) to map original colors to new ones. This will give us precise control over the look and feel of our game's sprites.
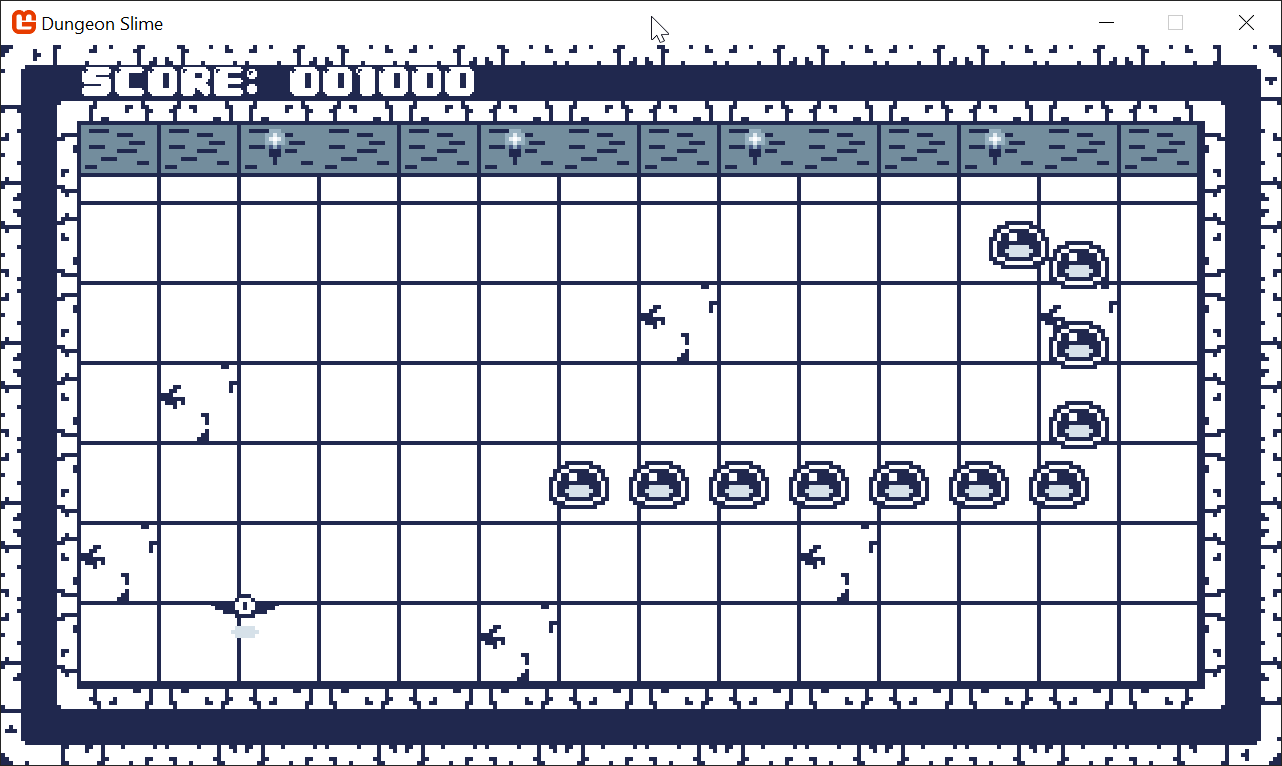
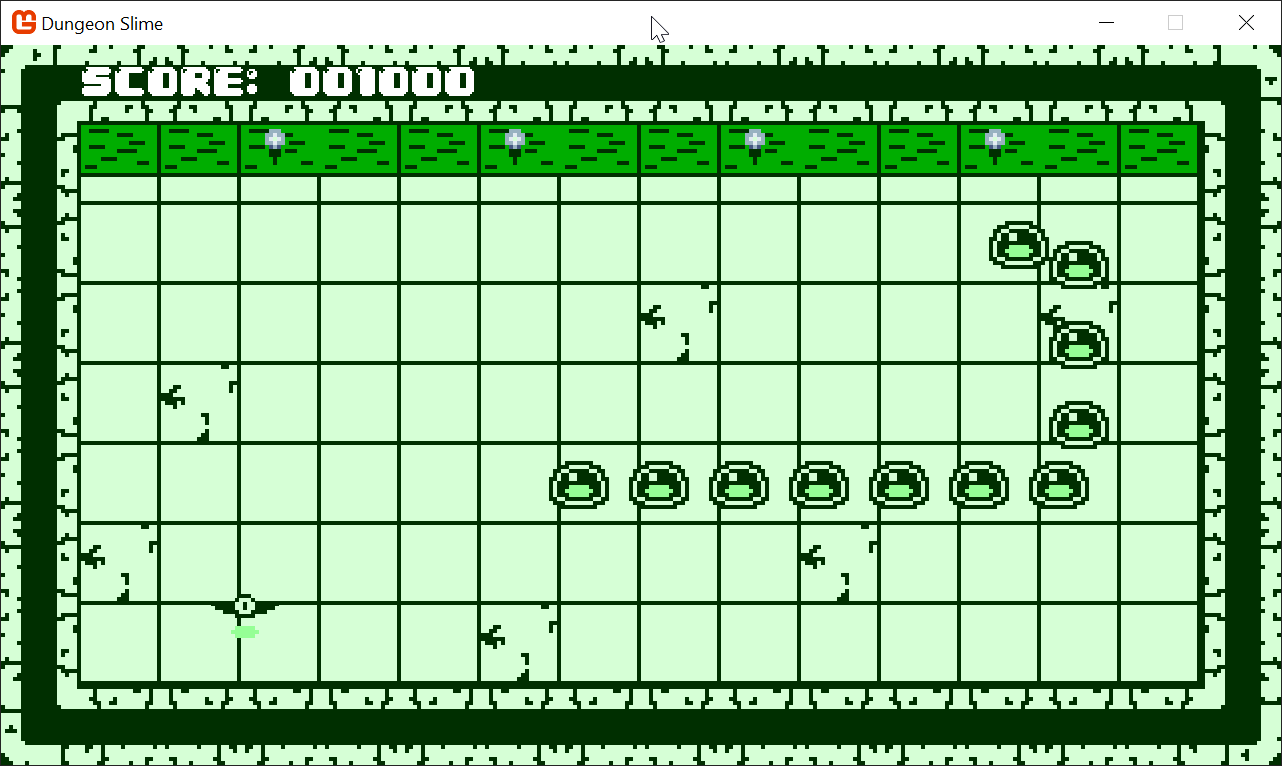
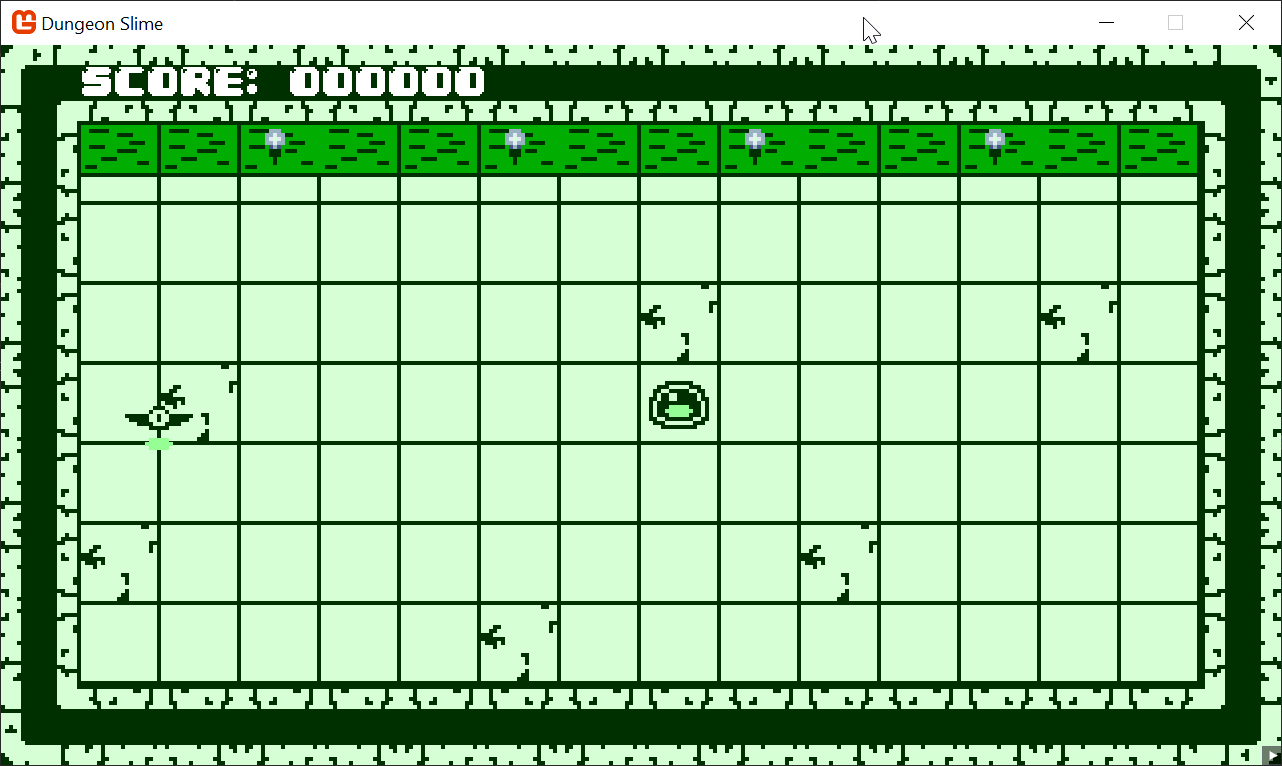
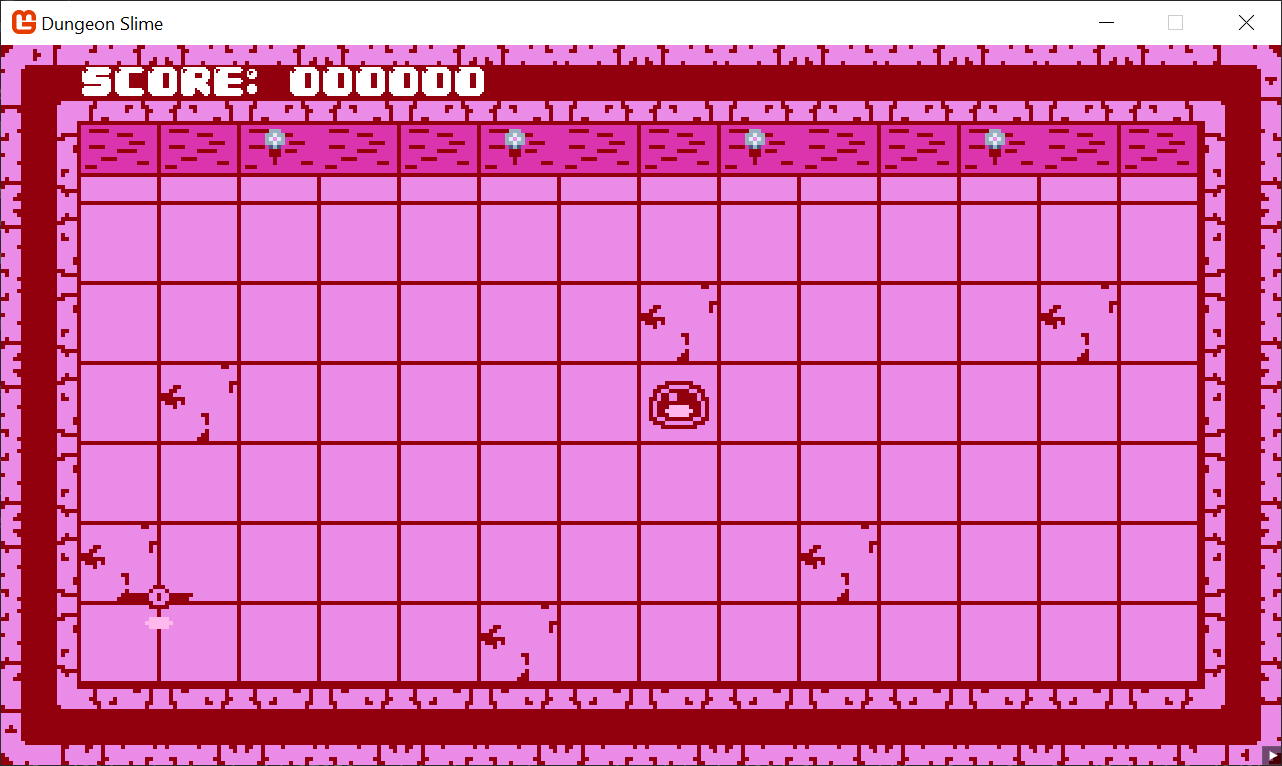
At the end of this chapter, we will be able to fine-tune the colors of the game. Here are a few examples:
 |
 |
|---|---|
| Figure 6-1: The default colors | Figure 6-2: A green variant of the game |
 |
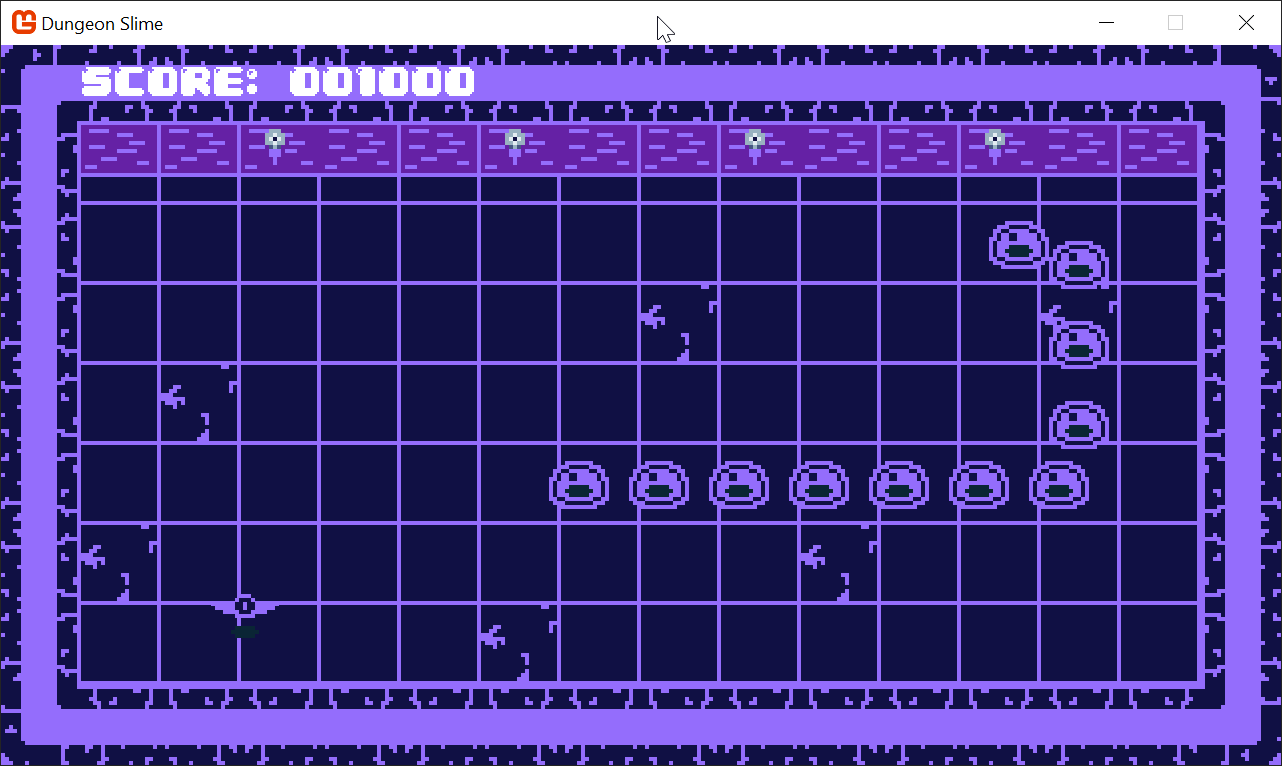 |
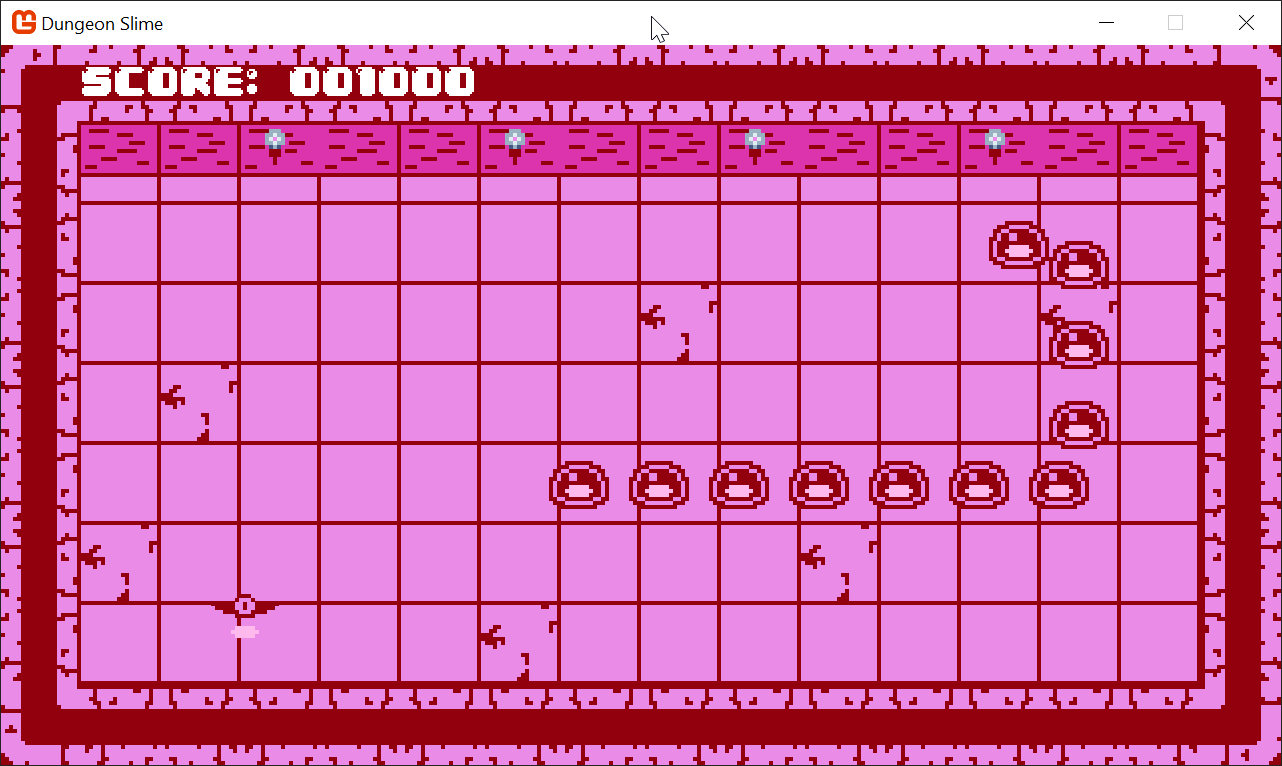
| Figure 6-3: A pink variant of the game | Figure 6-4: A purple variant of the game |
If you are following along with code, here is the code from the end of the previous chapter.
The Basic Color Swap Effect
At the moment, the game uses a lot of blue and gray textures. A common feature in retro-style games is to be able to change the color palette of the game. Another feature is to change the character's color during certain in-game events. For example, maybe the character flashes white when taking damage, or sparkles a gold color when picking up a combo. There are a few broad categories for implementing these styles of features:
- Have duplicate assets for all the variations required.
- Re-draw all of the game assets using each color palette.
- Use some sort of color swap shader effect to dynamically control the colors of sprites at runtime.
For simple use cases, sometimes it makes sense to simply re-draw the assets with different colors. However, the second option is more flexible and will enable more features, and since this is a shader tutorial, we will explore option 3 (as it is also the most efficient).
Getting Started
Start by creating a new Sprite Effect in the SharedContent MonoGame Content Builder file located in the MonoGameLibrary project, and name it colorSwapEffect.
Note
If the MGCB editor does not open, see the note from the previous chapter that requires you to MOVE the .config folder containing the dotnet-tools.json configuration, from the DungeonSlime folder to its parent folder for the solution.
 |
|---|
Figure 6-5: Add the colorSwapEffect.fx to MGCB Editor |
Switch back to your code editor, and in the GameScene (DungeonSlime Project), we need to do the following steps to start working with the new colorSwapEffect.fx,
Add a new property for the new
Materialinstance:// The color swap shader material. private Material _colorSwapMaterial;Load the new
colorSwapEffectshader in theLoadContent()method:public override void LoadContent() { // ... // Load the colorSwap material _colorSwapMaterial = Core.SharedContent.WatchMaterial("effects/colorSwapEffect"); _colorSwapMaterial.IsDebugVisible = true; // ... }Update the
Materialin theUpdate()method to enable hot-reload support:public override void Update(GameTime gameTime) { // ... // Update the colorSwap material if it was changed _colorSwapMaterial.Update(); // ... }Finally, we need to use the
colorSwapMaterialwhen drawing the sprites for theGameScene. For now, as we explore the color swapping effect, we are going to disable thegrayscaleEffectfunctionality. In theDraw()method replace the_grayscaleEffectfor the_colorSwapMaterial. Also, add the effect to theelseblock, like this:public override void Draw(GameTime gameTime) { // Clear the back buffer. Core.GraphicsDevice.Clear(Color.CornflowerBlue); if (_state != GameState.Playing) { // We are in a game over state, so apply the saturation parameter. _grayscaleEffect.SetParameter("Saturation", _saturation); // And begin the sprite batch using the grayscale effect. Core.SpriteBatch.Begin(samplerState: SamplerState.PointClamp, effect: _colorSwapMaterial.Effect); } else { // Otherwise, just begin the sprite batch as normal. Core.SpriteBatch.Begin(samplerState: SamplerState.PointClamp, effect: _colorSwapMaterial.Effect); } // ... }
Note
Yes, the grayscaleEffect is disabled/removed for now. But we will bring it back more powerful than you can possibly imagine.
Now when you run the game, it will look the same, but the new shader is being used to draw all the sprites in the GameScene. To verify, you can try changing the shader function in the colorSwapEffect.fx to force the red channel to be 1, just to see some visually striking confirmation the new shader is being used:
// ...

float4 MainPS(VertexShaderOutput input) : COLOR
{
   float4 originalColor = tex2D(SpriteTextureSampler,input.TextureCoordinates) * input.Color;
   originalColor.r = 1; // force the red-channel
   return originalColor;
}

// ...
 |
|---|
| Figure 6-6: Confirm the shader is being used |
Warning
The menu will not use the color swapper.
The game's menu is being drawn with GUM, and we are not configuring any shaders on the GUM menu yet. For now, it will continue to draw with its old colors.
For debugging purposes, we will disable the game's update logic so the player and bat are not moving. This will let us focus on developing the look of the shader without getting distracted by the movement and game logic of game-over menus and score.
The easiest way to disable all of the game logic is to return early from the GameScene's Update() method, thus short circuiting all of the game logic:
public override void Update(GameTime gameTime)
{
    // Ensure the UI is always updated
    _ui.Update(gameTime);

    // Update the grayscale effect if it was changed
    _grayscaleEffect.Update();
    _colorSwapMaterial.Update();

    // Prevent the game from actually updating. TODO: remove this when we are done playing with shaders!
    return;

    // ...
}
Hard Coding Color Swaps
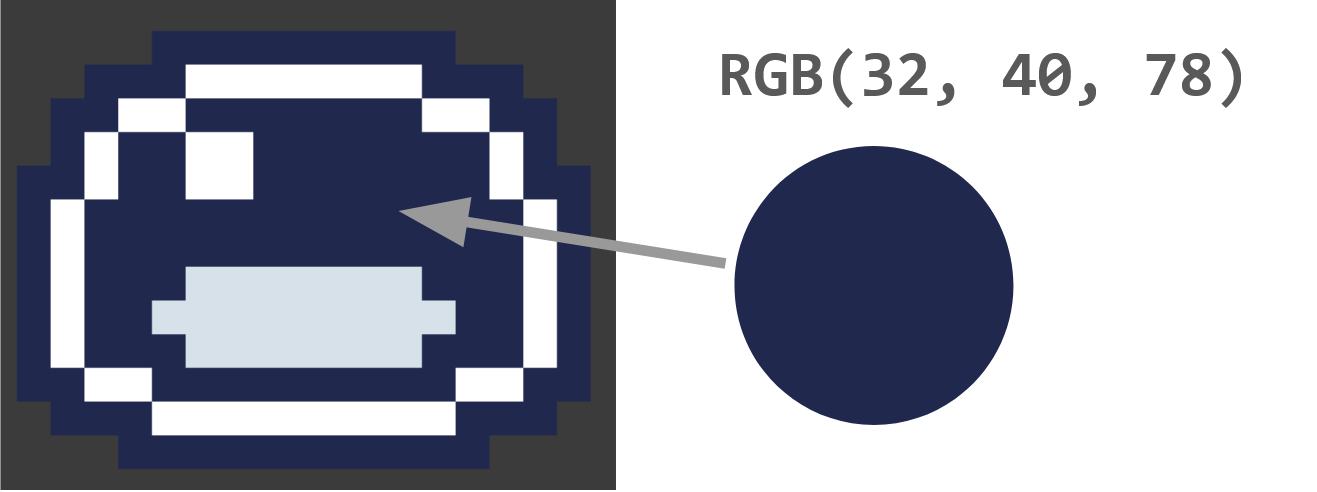
The goal is to be able to change the color of the sprites drawn with the _colorSwapMaterial. To build some intuition, one of the most straightforward ways to change the color is to hard-code a table of colors in the colorSwapEffect.fx file. The texture atlas used to draw the slime character uses a color value of rgb(32, 40, 78) for the body of the slime.
 |
|---|
| Figure 6-7: The slime uses a dark blue color |
The shader code could just do an if check for this color, and when any of the pixels are that color, return a hot-pink color instead. Try swapping out the "MainPS" shader function in the colorSwapEffect.fx file to the following, the highlighted section shows where the hard coded color swap is happening:
// ...

float4 MainPS(VertexShaderOutput input) : COLOR
{
    float4 originalColor = tex2D(SpriteTextureSampler,input.TextureCoordinates) * input.Color;

    // the color values are stored between 0 and 1,
    //  this converts the 0 to 1 range to 0 to 255, and casts to an int.
    int red = originalColor.r * 255;
    int green = originalColor.g * 255;
    int blue = originalColor.b * 255;

    // check for the hard-coded blue color
    if (red == 32 && green == 40 && blue == 78)
    {
        float4 hotPink = float4(.9, 0, .7, 1);
        return hotPink;
    }

    return originalColor;
}

// ...
That would produce an image like this,
 |
|---|
| Figure 6-8: The blue color is hardcoded to pink |
Using a Color Map
The problem with the hard-coded approach is that we would need to have an if check for each color that should be swapped. Depending on your work ethic, there are already too many colors in the Dungeon Slime assets to hardcode them all in a shader. Instead of hard coding the color swaps as if statements, we can create a table of colors that maps asset color to final color.
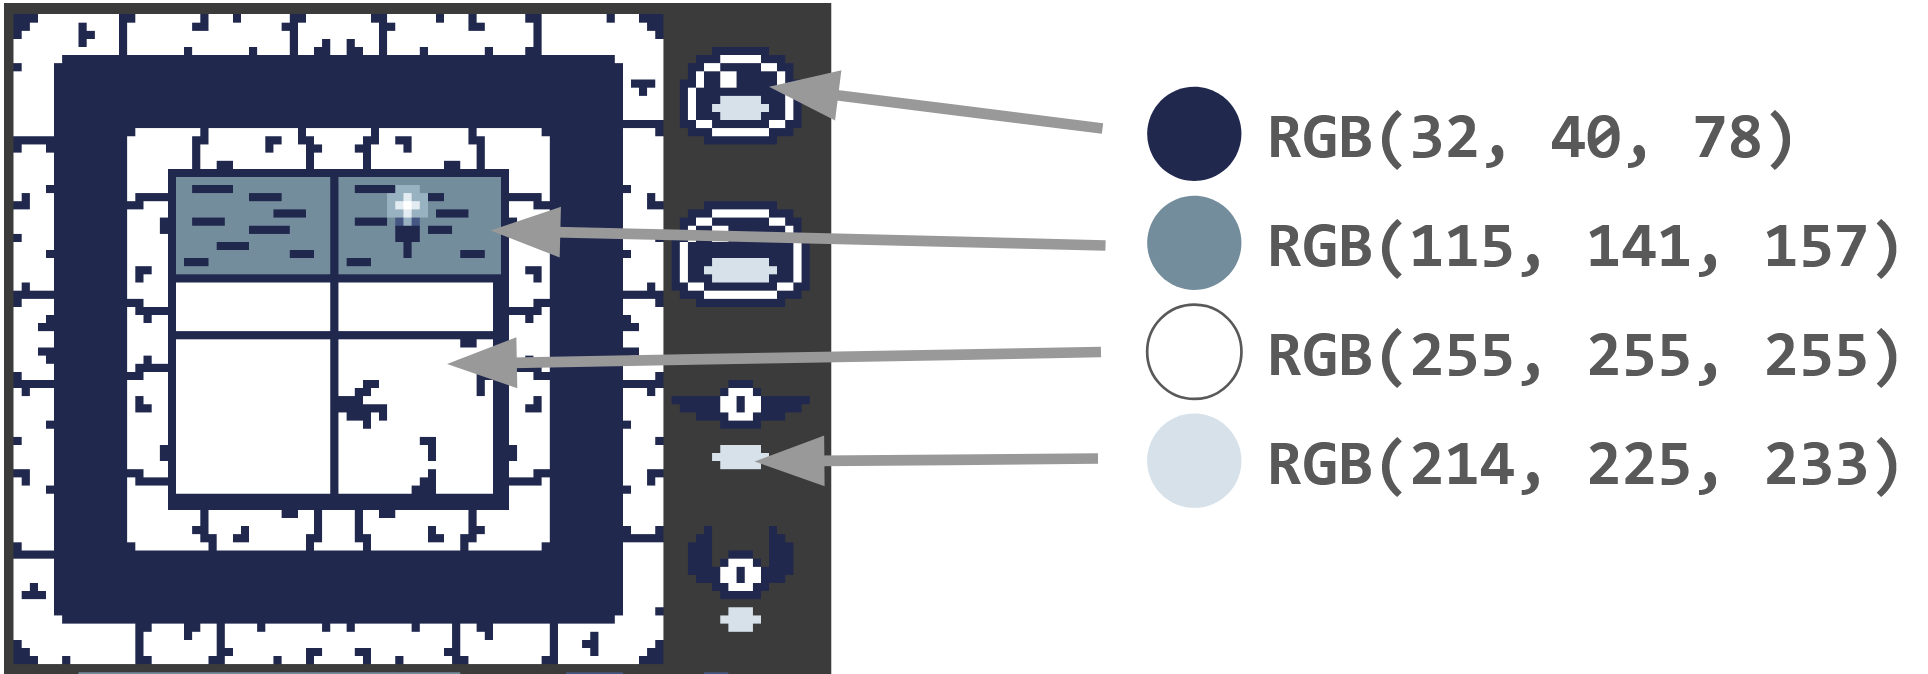
Conceptually, a table structure is a series of key -> value pairs. We could represent each asset color as a key, and store the swap color as a value. To build up a good example, let us find a few more colors from the Dungeon Slime assets.
 |
|---|
| Figure 6-9: The colors from the assets |
And here they are written out,
- dark-blue -
rgb(32, 40, 78) - gray-blue -
rgb(115, 141, 157) - white -
rgb(255, 255, 255) - light gray-blue -
rgb(214, 225, 233)
Our goal is to treat those colors as keys into a table that results in a final color value. Fortunately, all of the red channels are unique across all 4 input colors. The red channels are 32, 115, 255, and 214.
As a demonstration, if we were using C# to create a table, it might look like this:
Note
You do not need to add this to your project. This code is just for conversation.
var map = new Dictionary<int, Color>
{
    // picked some random colors for the values
    [32] = Color.MonoGameOrange,
    [115] = Color.CornflowerBlue,
    [255] = Color.Firebrick,
    [214] = Color.Salmon
};
Unfortunately, shaders do not support the Dictionary<> type, so we need to find another way to represent the table in a shader friendly format. Shaders however, are extremely good at reading data from textures, so we will encode the table information inside a custom texture. Imagine a custom texture that was 256 pixels wide, but only 1 pixel tall. We could treat the key values from above (32, 115, 255, and 214) as locations along the x-axis of the image, and the color of each pixel as the value.
These images are not to scale, because a 256x1 pixel image would not show well on a web browser. Here are the original colors laid out in a 256x1 pixel image, with the color's red channel value written below the pixel.
 |
|---|
| Figure 6-10: The original colors |
We could produce a second texture that puts different color values in the same key positions.
 |
|---|
| Figure 6-11: An abstract view of a 255 x 1 texture |
Here is the actual texture with the swapped colors. Download this image and add it to your DungeonSlime Content's "images" folder. Once downloaded, do not forget to also open the MGCB editor in the DungeonSlime project and add the "existing item".
Note
This image is not to scale. Remember, it is a 256x1 pixel image. This preview is being scaled up to a height of 32 pixels just for visualization.
 |
|---|
| Figure 6-12: The color table texture |
We now need to load and pass the texture to the colorSwapEffect shader.
Add a
_colorMapproperty to theGameSceneclass to hold a reference for the Color map texture:private Texture2D _colorMap;Then add the following to the
LoadContentmethod, just after loading the_colorSwapMaterial:public override void LoadContent() { // ... // Load the colorSwap material _colorSwapMaterial = Core.SharedContent.WatchMaterial("effects/colorSwapEffect"); _colorSwapMaterial.IsDebugVisible = true; _colorMap = Core.Content.Load<Texture2D>("images/color-map-1"); _colorSwapMaterial.SetParameter("ColorMap", _colorMap); }And update the
colorSwapEffect.fxshader to accept the new color map:// the main Sprite texture passed to SpriteBatch.Draw() Texture2D SpriteTexture; sampler2D SpriteTextureSampler = sampler_state { Texture = <SpriteTexture>; }; // the custom color map passed to the Material.SetParameter() Texture2D ColorMap; sampler2D ColorMapSampler = sampler_state { Texture = <ColorMap>; MinFilter = Point; MagFilter = Point; MipFilter = Point; AddressU = Clamp; AddressV = Clamp; }; // ...
The Texture2D and sampler2D declarations are required to read from textures in a MonoGame shader. A Texture2D represents the pixel data of the image. A sampler2D defines how the shader is allowed to read data from the Texture2D.
The ColorMapSampler has a lot of extra properties (MinFilter, MagFilter, MipFilter, AddressU, and AddressV) that control exactly how the texture data is read from the ColorMap.
By default, when a sampler reads data from a texture in a shader, it will subtly blend nearby pixel values to increase the visual quality. However, when a texture is being used as a look-up table, this blending is problematic because it will distort the data stored in the texture. The Point value given to the Filter properties tells the sampler to only read one pixel value.
When a sampler is reading a texture, there is always some location being used to read pixel data from. The texture coordinate space is from 0 to 1, in both the u and v axes.
- By default, if a value greater than 1, or less than 0 is given, the sampler will wrap the value around to be within the range 0 to 1. For example,
1.15would become0.15. - The
Clampvalue prevents the wrapping and cuts the input off at the min and max values. For example,1.15becomes1.0.
The shader function can now do two steps to perform the color swap,
- Read the original color value of the pixel,
- Use the original color's red value as the
keyin the look-up texture to extract the swap colorvalue.
To help visualize the effect, it will be helpful to visualize the original color and the swap color.
Add a control parameter that can be used to select between the two colors in the
colorSwapEffectshader:// ... // a control variable to lerp between original color and swapped color float OriginalAmount; // ... float4 MainPS(VertexShaderOutput input) : COLOR { // ... }Then replace the
MainPSshader function to the following, with the highlight showing the progressive effect:// ... float4 MainPS(VertexShaderOutput input) : COLOR { // read the original color value float4 originalColor = tex2D(SpriteTextureSampler,input.TextureCoordinates); // produce the key location float2 keyUv = float2(originalColor.r, 0); // read the swap color value float4 swappedColor = tex2D(ColorMapSampler, keyUv) * originalColor.a; // return the result color return lerp(swappedColor, originalColor, OriginalAmount); } // ...Now in the game, we can visualize the color swap by adjusting the control parameter. Perhaps the colors we picked do not look very nice.
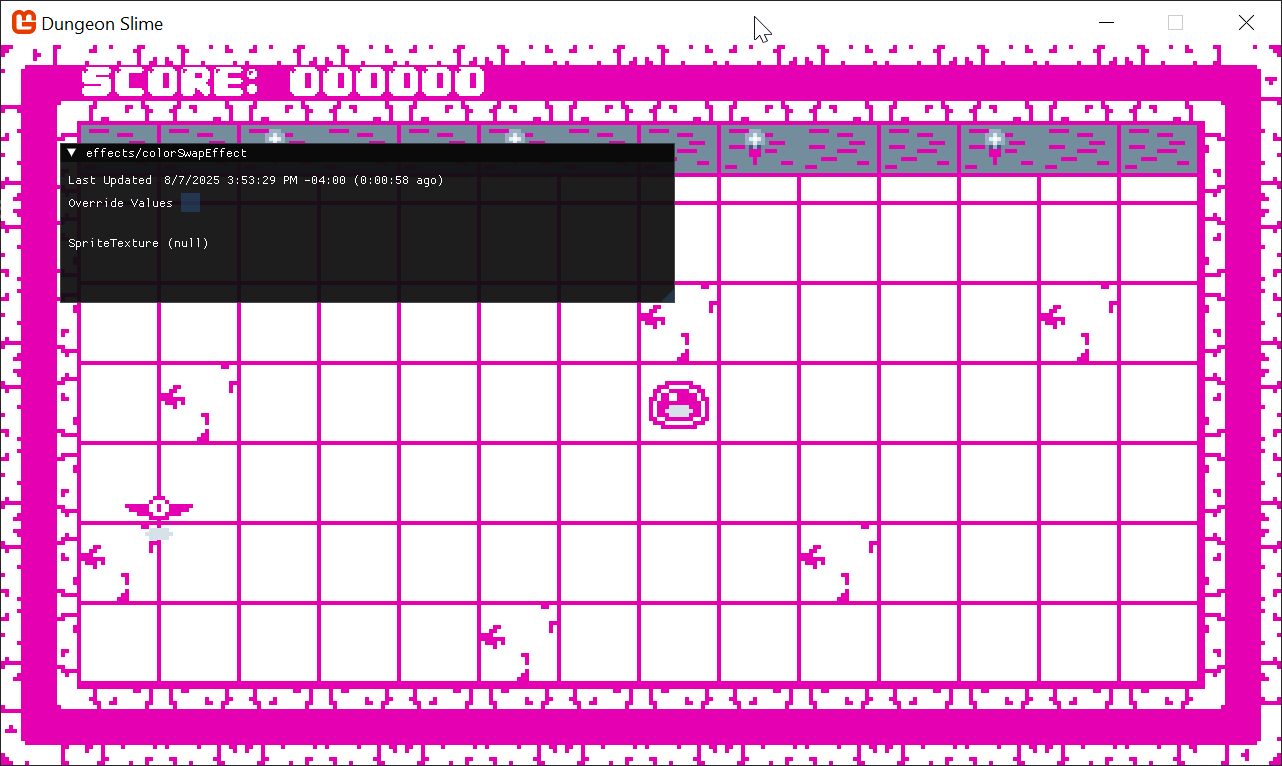
Figure 6-13: The color swap effect is working! That looks pretty good, but changing between original and swap colors reveals a visual glitch. The color table did not account for some of the original colors. All of the colors get mapped, and our default color in the map was white, so some of the game's art is just turning white. For example, look at the torches on the top-wall.
To fix this, we can adjust the color look-up map to use transparent values by default. Use this texture instead, saving over the original
color-map-1.pngin the DungeonSlime's Content image folder to avoid having to change anything else.
Figure 6-14: The color map with a transparent default color Now, anytime the swapped color value has an
alphavalue of zero, the implication is that the color was not part of the table. In that case, the shader should default to the original color instead of the non-existent mapped value.Back in the shader, before the final
returnline, add this snippet:
// ...

float4 MainPS(VertexShaderOutput input) : COLOR
{
    // read the original color value
    float4 originalColor = tex2D(SpriteTextureSampler,input.TextureCoordinates);

    // produce the key location
    float2 keyUv = float2(originalColor.r, 0);

    // read the swap color value
    float4 swappedColor = tex2D(ColorMapSampler, keyUv) * originalColor.a;

    // ignore the swap if the map does not have a value
    bool hasSwapColor = swappedColor.a > 0;
    if (!hasSwapColor)
    {
        return originalColor;
    }

    // return the result color
    return lerp(swappedColor, originalColor, OriginalAmount);
}

// ...
| Figure 6-15: Colors that are not in the map do not change color |
One final glitch becomes apparent if you stare at that long enough, which is that the center pixel in the torch is changing color from its original white, to our mapped orange color. In a way, that is by design, because the white values are being mapped. Fixing this would require modifying the original assets to change the color of the torch center; that is left as an exercise for the reader.
Tip
Color lerp() is a short-cut
In the example, we are using linear interpolation to find a color between swappedColor and originalColor. It works okay, but, the interpolation is happening in RGB color space. RGB is just one possible way to represent a color. It turns out that converting the colors to a different color space, like HSL, interpolating there, and then converting the result back to RGB can produce more visually pleasing results. Check out this great in depth article on the topic.
Nicer Colors
The colors used above are not the nicest. They were used for demonstration purposes. For you to experiment with, here are some nicer textures to use that produce better results.
 |
 |
 |
|---|---|---|
| Figure 6-16: A dark purple look | Figure 6-17: A green look | Figure 6-18: A pink look |
 |
 |
 |
| Download the dark-purple color map | Download the green color map | Download the pink color map |
Creating Dynamic Color Maps
So far, we have created color maps and brought them into the game as content. However, it would be cool to create these color maps dynamically with a C# script based on gameplay values and provide that texture to the shader in realtime. Our goal will be to modify the snake's color piece by piece when the player eats a bat.
To get started, we first need to devise a way to create a custom color map and pass it to the shader.
Create a new class file in the MonoGameLibrary/Graphics folder called
RedColorMap.cs:using System.Collections.Generic; using Microsoft.Xna.Framework; using Microsoft.Xna.Framework.Graphics; namespace MonoGameLibrary.Graphics; public class RedColorMap { public Texture2D ColorMap { get; set; } public RedColorMap() { ColorMap = new Texture2D(Core.GraphicsDevice, 256, 1, false, SurfaceFormat.Color); } /// <summary> /// Given a dictionary of red-color values (0 to 255) to swapColors, /// Set the values of the <see cref="ColorMap"/> so that it can be used /// As the ColorMap parameter in the colorSwapEffect. /// </summary> public void SetColorsByRedValue(Dictionary<int, Color> map, bool overWrite = true) { var pixelData = new Color[ColorMap.Width]; ColorMap.GetData(pixelData); for (var i = 0; i < pixelData.Length; i++) { // if the given color dictionary contains a color value for this red index, use it. if (map.TryGetValue(i, out var swapColor)) { pixelData[i] = swapColor; } else if (overWrite) { // otherwise, default the pixel to transparent pixelData[i] = Color.Transparent; } } ColorMap.SetData(pixelData); } }Add another property to store the reference to the Color mapping code from
RedColorMapin theGameSceneclass:private RedColorMap _slimeColorMap;As we are going to use a
Dictionaryfor the new mapping structure, we will also need an additional using, so add the following to the top of theGameSceneclass:using System.Collections.Generic;Now, to check if it is working, create the data to store in the new
_slimeColorMapvariable at the end of theLoadContent()in theGameScene(AFTER the original_colorMaplogic):public override void LoadContent() { // ... _slimeColorMap = new RedColorMap(); _slimeColorMap.SetColorsByRedValue(new Dictionary<int, Color> { // main color [32] = Color.Khaki, // wall color [115] = Color.Coral, // shadow color [214] = Color.MonoGameOrange, // floor [255] = Color.Tomato }); _colorSwapMaterial.SetParameter("ColorMap", _slimeColorMap.ColorMap); }
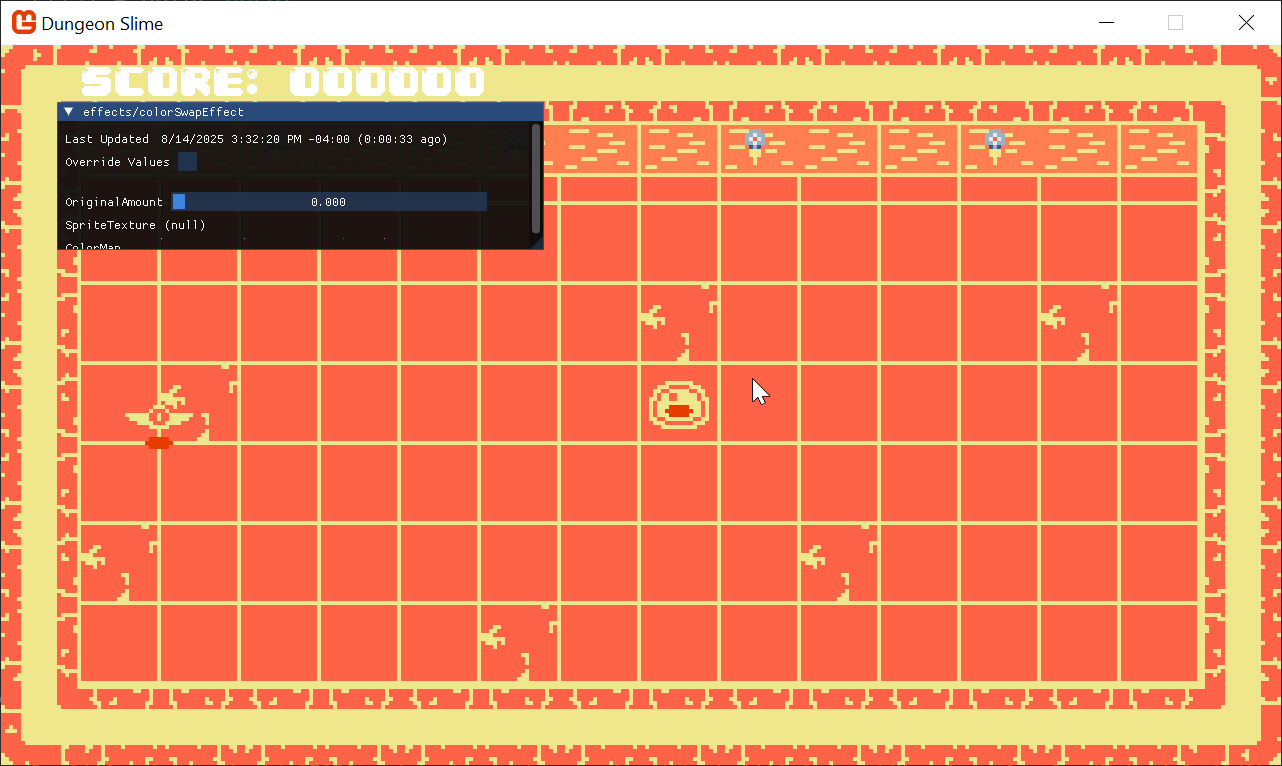 |
|---|
| Figure 6-19: Changing the colors from runtime |
Changing Slime Color
The goal is to change the color of the slime independently from the rest of the game. The SpriteBatch will try to make as few draw calls as possible and because all of the game assets are in a sprite-atlas, any shader parameters will be applied for all sprites.
However, you can change the sortMode to Immediate to change the SpriteBatch's optimization to make it draw sprites immediately with whatever current shader parameters exist.
Warning
The Immediate sort mode stops the SpriteBatch from batching your sprites into a single draw call, and instead, makes a draw call per sprite. More draw calls means more work between the CPU and GPU, and that means slower performance compared to fewer draw calls. However, game programming is about identifying acceptable trade offs between performance and gameplay value.
Dungeon Slime is a simple game, and it is not worth the effort it to try and optimize this part of the game, at this point.
As an exercise for the reader, try to think of a way to re-write this section with two draw calls instead of one per sprite.
hint: there are only 2 color maps that are ever on screen at any given moment.
Change both the
SpriteBatch.Begin()calls in theDrawmethod of theGameSceneclass to look like this:Core.SpriteBatch.Begin( samplerState: SamplerState.PointClamp, sortMode: SpriteSortMode.Immediate, effect: _colorSwapMaterial.Effect);Then update the draw code itself to update the shader parameter between drawing the slime and the rest of the game:
Note
The
_bat.Draw()call has also moved up to ensure it is not affected when drawing the Slime:public override void Draw(GameTime gameTime) { // ... // Update the colorMap _colorSwapMaterial.SetParameter("ColorMap", _colorMap); // Draw the tilemap _tilemap.Draw(Core.SpriteBatch); // Draw the bat. _bat.Draw(); // Update the colorMap for the slime _colorSwapMaterial.SetParameter("ColorMap", _slimeColorMap.ColorMap); // Draw the slime. _slime.Draw(); // Always end the sprite batch when finished. Core.SpriteBatch.End(); // Draw the UI _ui.Draw(); }
Now the slime appears with one color swap configuration and the rest of the scene uses the color swap configured via the content.
Note
The pink color map is being used instead of the color-map-1.png from earlier.
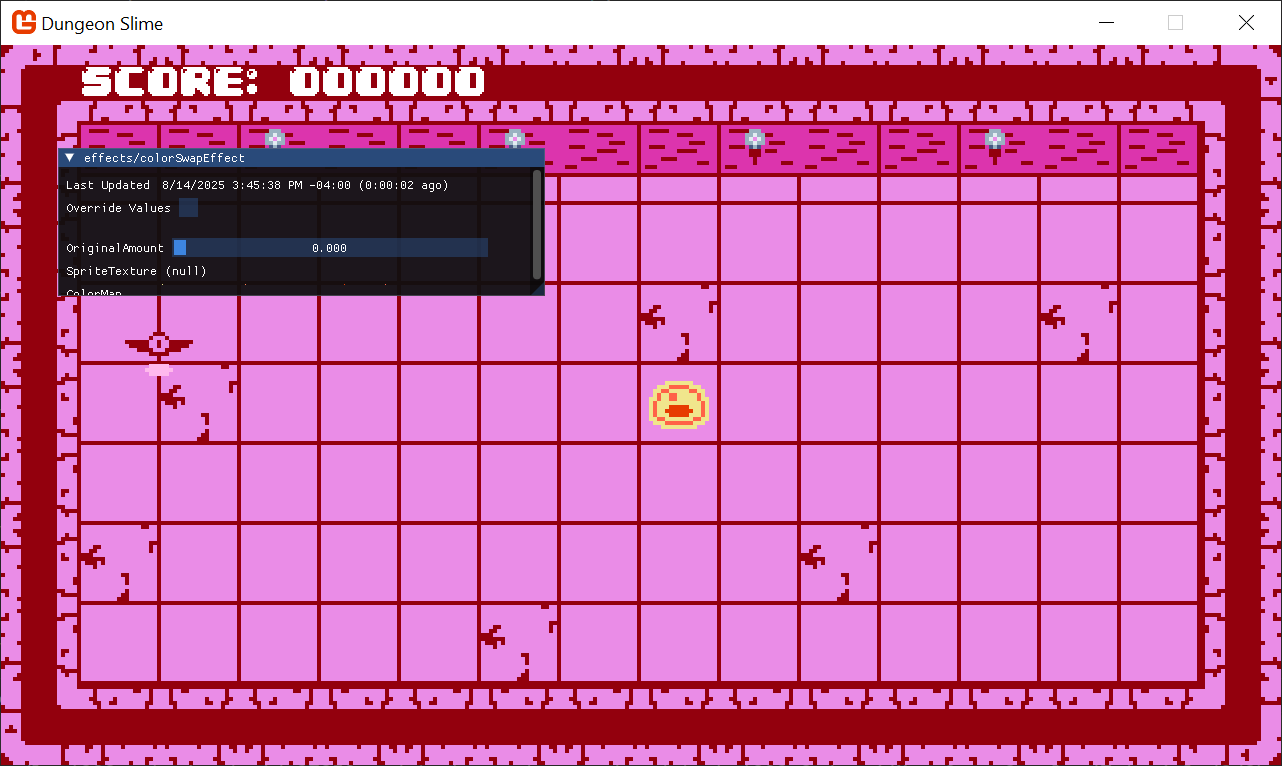 |
|---|
| Figure 6-20: The slime is a different color configuration than the game |
If we want to swap the color of the slime between two color maps, we need a way to clone an existing color map into the dynamic color table.
Add this method to the
RedColorMapclass:public void SetColorsByExistingColorMap(Texture2D existingColorMap) { var existingPixels = new Color[256]; existingColorMap.GetData(existingPixels); var map = new Dictionary<int, Color>(); for (var i = 0; i < existingPixels.Length; i++) { map[i] = existingPixels[i]; } SetColorsByRedValue(map); }Then modify the instance in the
GameSceneto start the color map based on whatever color map texture was loaded:public override void LoadContent() { // ... _slimeColorMap = new RedColorMap(); _slimeColorMap.SetColorsByExistingColorMap(_colorMap); _slimeColorMap.SetColorsByRedValue(new Dictionary<int, Color> { // main color [32] = Color.Yellow, }, false); _colorSwapMaterial.SetParameter("ColorMap", _slimeColorMap.ColorMap); }Now in the
Draw()method, we can optionally change the color map based on some condition. In this example, the color map only being set on every other second:public override void Draw(GameTime gameTime) { // ... // Draw the bat. _bat.Draw(); // Update the colorMap for the slime if ((int)gameTime.TotalGameTime.TotalSeconds % 2 == 0) { _colorSwapMaterial.SetParameter("ColorMap", _slimeColorMap.ColorMap); } // Draw the slime. _slime.Draw(); // ... }
| Figure 6-21: The slime's color changes based on time |
Ultimately, it would be nice to control the color value per slime segment, not the entire slime. When the player eats a bat, the slime segments should change color in an animated way so that it looks like the color is "moving" down the slime segments.
To do this, replace the
Slime.Draw()method in theSlime.csclass in the DungeonSlime/GameObjects folder to look like this:/// <summary> /// Draws the slime. /// </summary> public void Draw(Action<int> configureSpriteBatch) { // Iterate through each segment and draw it for (var i = 0 ; i < _segments.Count; i ++) { var segment = _segments[i]; // Calculate the visual position of the segment at the moment by // lerping between its "at" and "to" position by the movement // offset lerp amount Vector2 pos = Vector2.Lerp(segment.At, segment.To, _movementProgress); // Allow the sprite batch to be configured before each call. configureSpriteBatch(i); // Draw the slime sprite at the calculated visual position of this // segment _sprite.Draw(Core.SpriteBatch, pos); } }As we want to see how long the slime is for the effect, we need to expose how long the Slime's segments are, so add the following public property to the Slime:
// The size of the slime
public int Size => _segments.Count;
Then, in the
GameScene's logic, we need to add a local field to remember the last time the slime'sGrow()method was called:private TimeSpan _lastGrowTime;In order to capture the time that has passed, we need to be able to check this for collisions, so in the
Updatemethod, passgameTimeto theCollisionChecksmethod as shown below:public override void Update(GameTime gameTime) { // ... // Update the bat; _bat.Update(gameTime); // Perform collision checks CollisionChecks(gameTime); }In the
CollisionChecksmethod, alter the method signature and add this line after theGrow()method is invoked:private void CollisionChecks(GameTime gameTime) { // ... if (slimeBounds.Intersects(batBounds)) { // ... // Tell the slime to grow. _slime.Grow(); // Remember when the last time the slime grew _lastGrowTime = gameTime.TotalGameTime; // ... } // ... }Now, in the GameScene's
Draw()method, modify the slime's draw invocation to use the newconfigureSpriteBatchcallback:public override void Draw(GameTime gameTime) { // ... // Draw the slime. _slime.Draw(segmentIndex => { const int flashTimeMs = 125; var map = _colorMap; var elapsedMs = gameTime.TotalGameTime.TotalMilliseconds - _lastGrowTime.TotalMilliseconds; var intervalsAgo = (int)(elapsedMs / flashTimeMs); if (intervalsAgo < _slime.Size && (intervalsAgo - segmentIndex) % _slime.Size == 0) { map = _slimeColorMap.ColorMap; } _colorSwapMaterial.SetParameter("ColorMap", map); }); // ... }A bit of cleanup, if you left in the old time highlight code, make sure to REMOVE it from the
Drawmethod too (because the updatedslime.Drawnow handles this).// REMOVE ME // Update the colorMap for the slime // if ((int)gameTime.TotalGameTime.TotalSeconds % 2 == 0) // { // _colorSwapMaterial.SetParameter("ColorMap", _slimeColorMap.ColorMap); // }Finally, play around with the colors until you find something you like.
Note
If nothing is playing, remember we disabled the gameplay earlier in this chapter for testing, so remove the extra return; statement in the Update method of the GameScene class to get it running again.
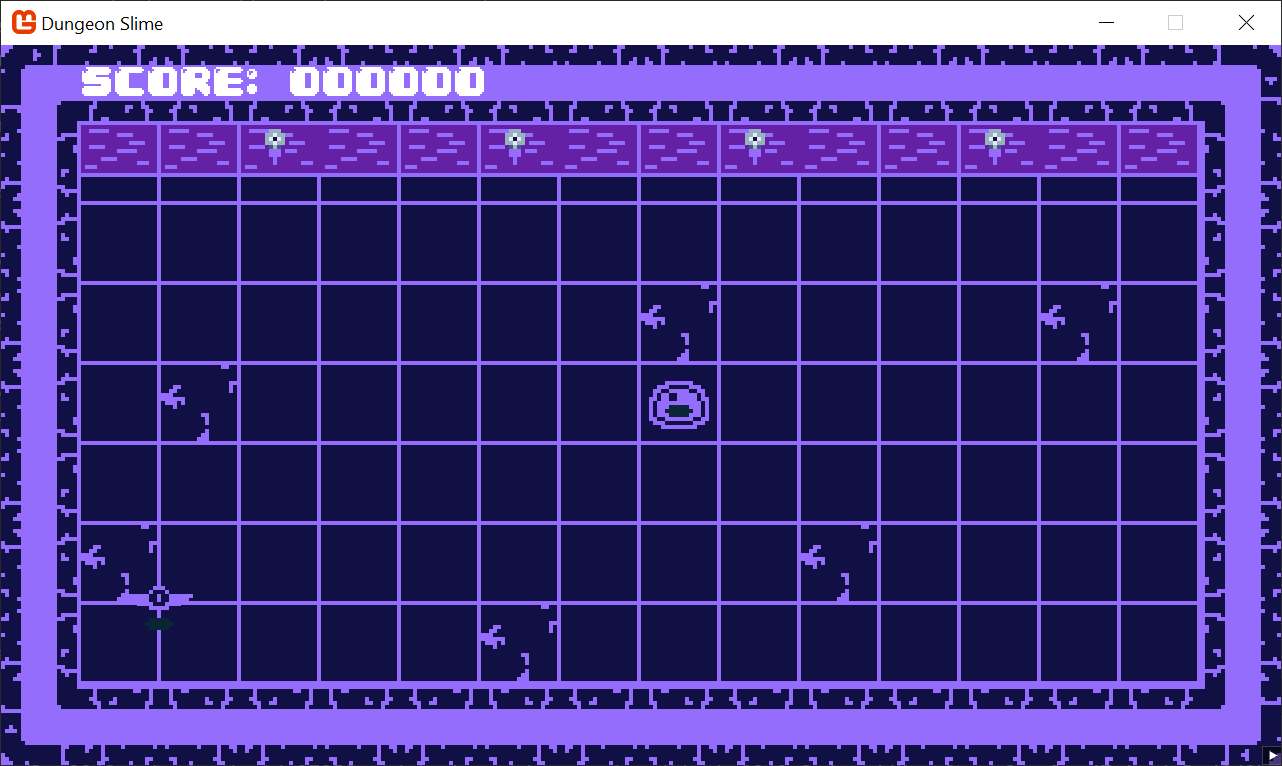
| Figure 6-22: The slime's color changes when it eats |
Note
The video above shows using the dark-purple color map being used instead of the pink from earlier.
Fixing the GrayScale
The color swap shader is working well, but to experiment with it, we had previously removed the pause screen's grayscale effect. Both effects are trying to modify the color of the game, so they naturally conflict with each other. To solve the problem, the shaders can be merged together into a single effect.
Extract the logic of the grayscale effect into a separate function and copy it into the
colorSwapEffect.fxfile:float4 Grayscale(float4 color) { // Calculate the grayscale value based on human perception of colors float grayscale = dot(color.rgb, float3(0.3, 0.59, 0.11)); // create a grayscale color vector (same value for R, G, and B) float3 grayscaleColor = float3(grayscale, grayscale, grayscale); // Linear interpolation between the grayscale color and the original color's // rgb values based on the saturation parameter. float3 finalColor = lerp(grayscale, color.rgb, Saturation); // Return the final color with the original alpha value return float4(finalColor, color.a); }In order for this to work, do not forget to add the
Saturationshader parameter to thecolorSwapEffect.fxfile:float Saturation;For readability, extract the logic of the color swap effect into a new function as well:
float4 SwapColors(float4 color)
{
    // produce the key location
    //  note the x-offset by half a texel solves rounding errors.
    float2 keyUv = float2(color.r , 0);

    // read the swap color value
    float4 swappedColor = tex2D(ColorMapSampler, keyUv) * color.a;

    // ignore the swap if the map does not have a value
    bool hasSwapColor = swappedColor.a > 0;
    if (!hasSwapColor)
    {
        return color;
    }

    // return the result color
    return lerp(swappedColor, color, OriginalAmount);
}
And now you can replace the main shader function so that it can chain these methods together:
float4 MainPS(VertexShaderOutput input) : COLOR
{
    // read the original color value
    float4 originalColor = tex2D(SpriteTextureSampler,input.TextureCoordinates);

    float4 swapped = SwapColors(originalColor);
    float4 saturated = Grayscale(swapped);

    return saturated;
}
Warning
Function Order Matters!
Make sure that the Grayscale and SwapColors functions appear before the MainPS function in the shader, otherwise the compiler will not be able to resolve the functions.
Now you can control the saturation manually with the debug slider,
| Figure 6-23: Combining the color swap and saturation effect |
The last thing to do is remove the old grayscaleEffect and re-write the game logic to set the Saturation parameter on the new effect.
In the
Draw()method, instead of having anifcase to start theSpriteBatchwith different settings, it can always be configured to start with the_colorSwapMaterial:public override void Draw(GameTime gameTime) { // Clear the back buffer. Core.GraphicsDevice.Clear(Color.CornflowerBlue); _colorSwapMaterial.SetParameter("Saturation", _saturation); Core.SpriteBatch.Begin( samplerState: SamplerState.PointClamp, sortMode: SpriteSortMode.Immediate, effect: _colorSwapMaterial.Effect); // Update the colorMap _colorSwapMaterial.SetParameter("ColorMap", _colorMap); // ... }In the
Update()method, we just need to set the_saturationback to1if the game is being played:public override void Update(GameTime gameTime) { // Ensure the UI is always updated _ui.Update(gameTime); // Update the colorSwap material if it was changed _colorSwapMaterial.Update(); if (_state != GameState.Playing) { // The game is in either a paused or game over state, so // gradually decrease the saturation to create the fading grayscale. _saturation = Math.Max(0.0f, _saturation - FADE_SPEED); // If its just a game over state, return back if (_state == GameState.GameOver) { return; } } else { _saturation = 1; } // ... }
| Figure 6-24: The grayscale effect has been restored |
At this point, you can remove the _grayscaleEffect from the GameScene.
- Remove the declaration.
- Remove where it was loaded in the
LoadContent()method. - Remove where it was used in the
Update()method.
You can also remove the shader itself from MGCB.
Color Look-Up Textures (LUTs)
The approach we used above is a simplified version of a broader technique called Color Look-Up Tables, or Color LUTs. In the version we wrote above, there is a large limitation about which colors can be used in the table. The key in the color table was the red channel value of the input colors. If you had two different input colors that shared the same red channel value, the technique would not work.
The limitation is often acceptable in game assets because you own the assets themselves and can author the textures to avoid the case where colors overlap on key values. However, when it is unavoidable, the key must be more complex than only the red value. For example, it could be unavoidable if your game needed more than 256 unique colors.
The next logical step is to make the key 2 color channels like red and green. In that case, the color texture would not be a 256x1 texture, it would be a 256x256 texture. The x axis would still represent the red channel, and now the y axis would represent the green channel. Now the game could have 256 * 256 unique colors, or 65,536.
Finally, if you need more colors, the final color channel can be included in the key, making the key be the combination of red, green, and blue channels. In the first case, the look-up texture was 256x1 pixels. In the second case, it was 256x256 pixels. The final case is a texture of size 2048x2048 pixels. Imagine a texture made up of smaller 256x256 textures, stored in an 8x8 grid.
Color LUTs are used in post-processing to adjust the final look and feel of games across the industry. The technique is called Tone-Mapping.
If you are interested in Color LUTs, check out the following articles,
- GPU Gems 2: Chapter 24 offers a sweeping overview of 3D Color LUTs.
- Frost Kiwi's Color LUT Article is a fantastic exploration of the topic with lots of additional sources to explore.
Conclusion
That was a really powerful technique! In this chapter, you accomplished the following:
- Implemented a color-swapping system using a 1D texture as a Look-Up Table (LUT).
- Created a
RedColorMapclass to dynamically generate these LUTs from C# code. - Used
SpriteSortMode.Immediateto apply different materials to different sprites in the same frame. - Combined the color swap and grayscale effects into a single, more versatile shader.
So far, all of our work has been in the pixel shader, which is all about changing the color of pixels. In the next chapter, we will switch gears and explore the vertex shader to manipulate the geometry of our sprites and add some surprising 3D flair to our 2D game.
You can find the complete code sample for this chapter - here.
Continue to the next chapter, Chapter 07: Sprite Vertex Effect