Setting up your development environment for Windows
A step-by-step guide for setting up your development environment on Windows.
This section provides a step-by-step guide for setting up your development environment on Windows.
MonoGame can work with most .NET compatible tools, but we recommend Visual Studio 2022
Alternatively, you can use JetBrains Rider or Visual Studio Code.
[Recommended] Install Visual Studio 2022
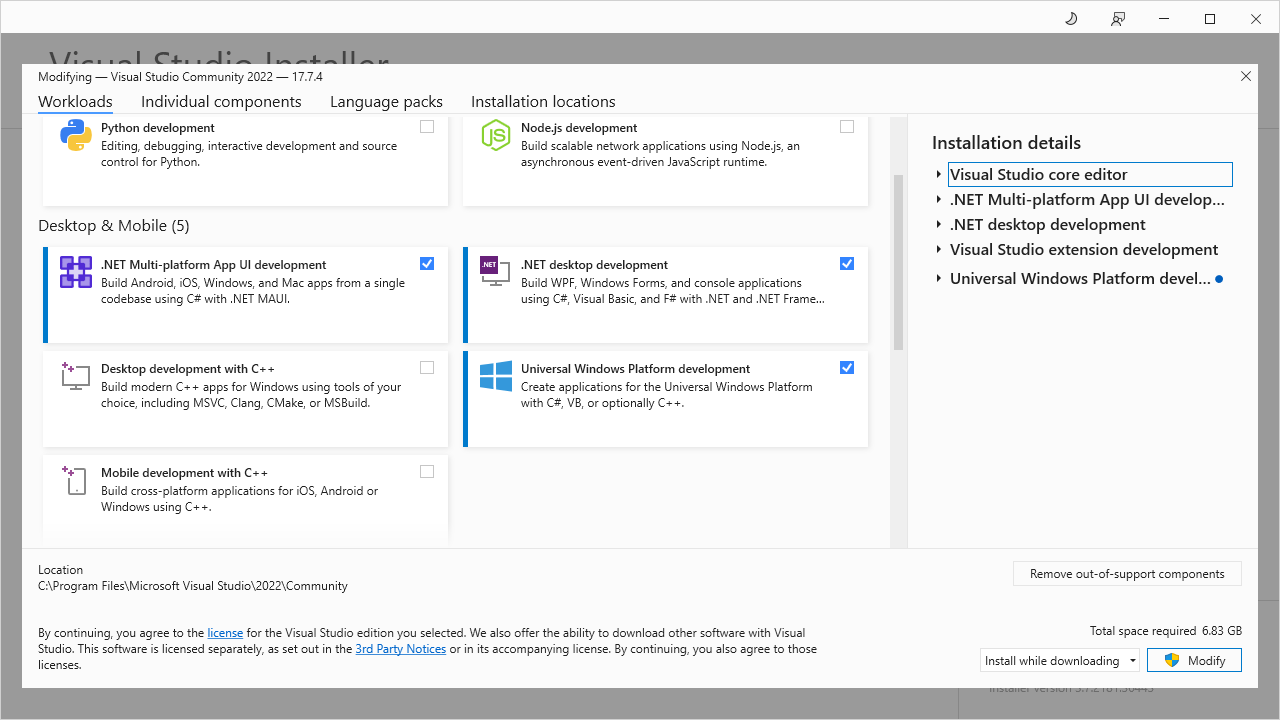
Before using MonoGame, you will need to install Visual Studio 2022
When installing Visual Studio, the following workloads are required depending on your desired target platform(s):
- Mandatory for all platforms:
- .Net desktop development
- Optional
- .Net Multi-platform App UI Development if you wish to target Android, iOS, or iPadOS.
- Universal Windows Platform development if you wish to build for Windows store or Xbox.
::: danger Targeting Windows If you are targeting the standard Windows DirectX backend, you will also need the DirectX June 2010 runtime for audio and gamepads to work properly. :::
Install MonoGame extension for Visual Studio 2022
To create new MonoGame projects from within Visual Studio 2022, you will need to install the MonoGame Framework C# project templates extension. The following steps demonstrate how to install the extension.
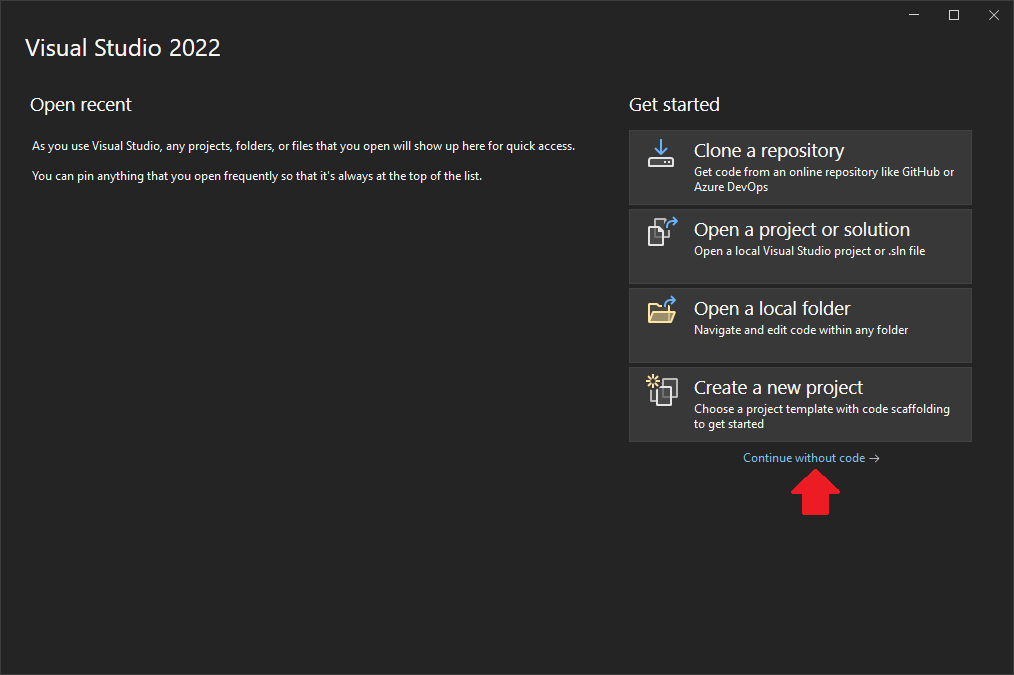
- Launch Visual Studio 2022
- Select Continue without code. This will launch Visual Studio without any project or solution opened.
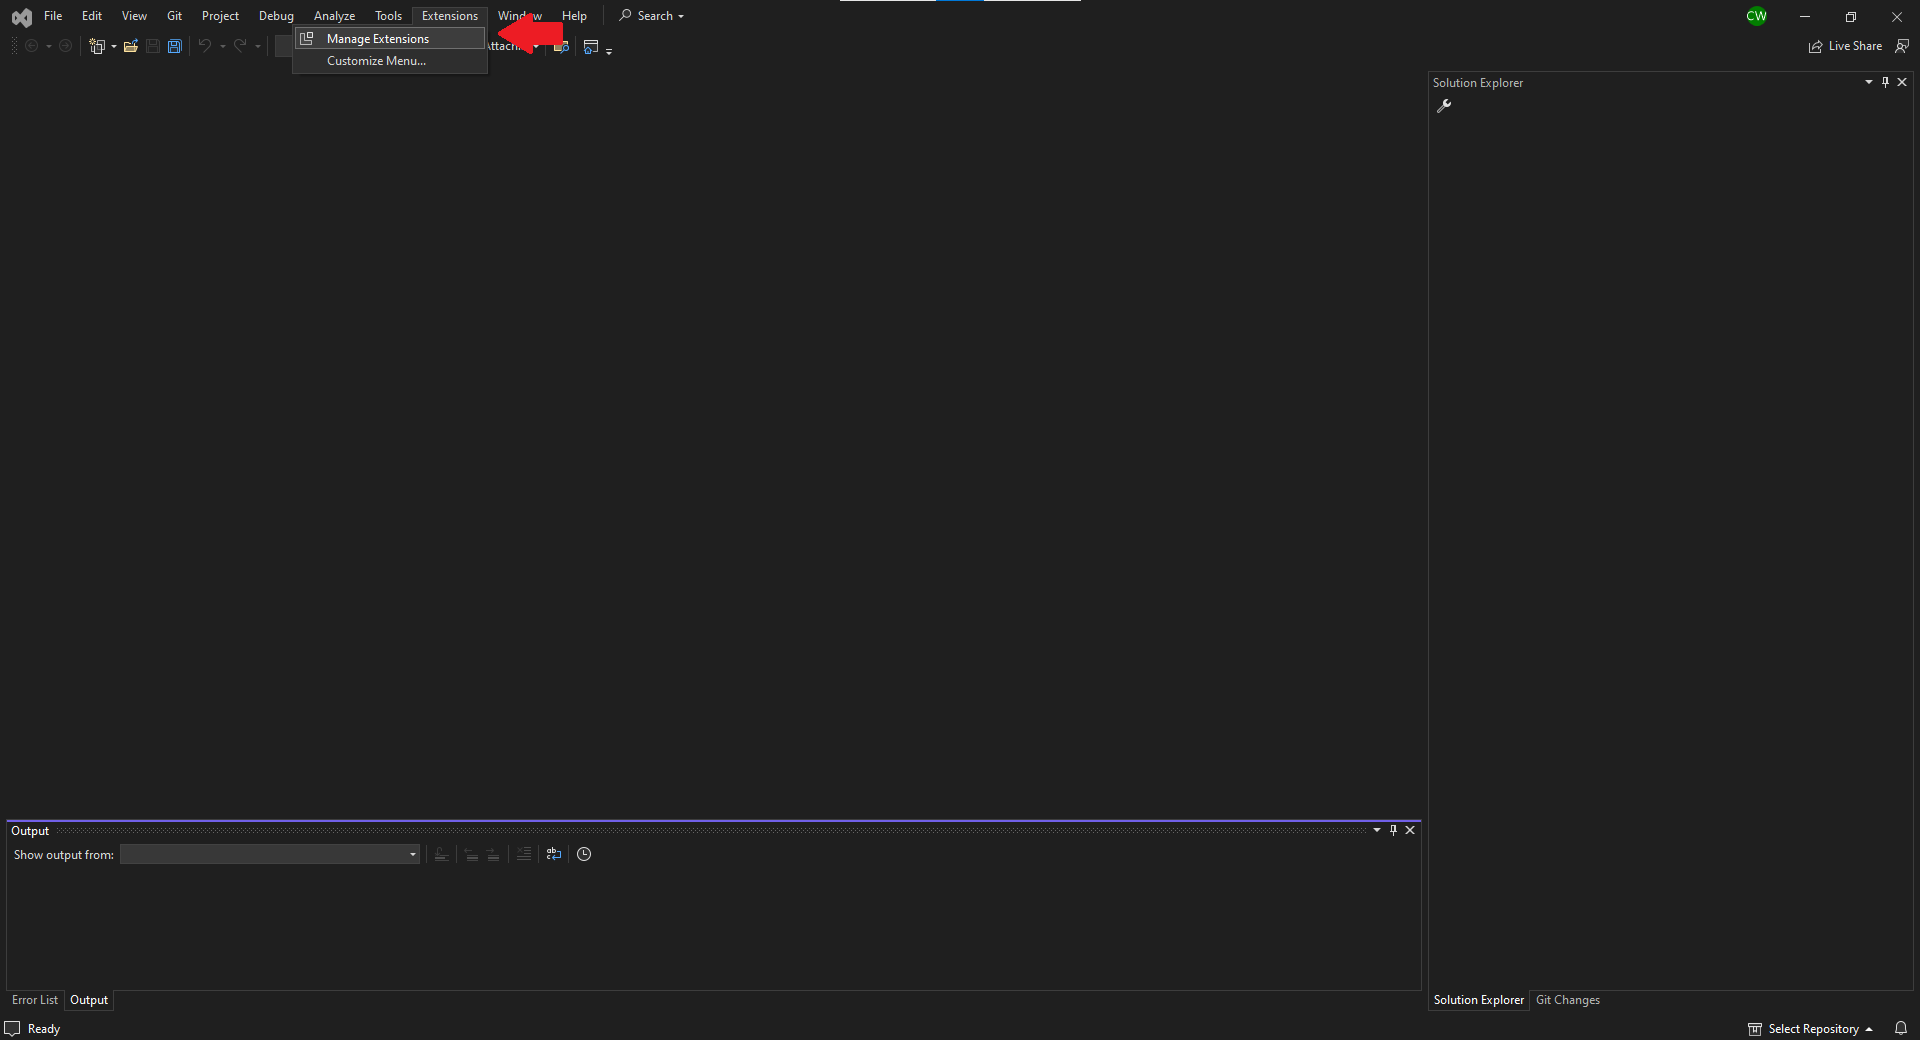
- Click "Extensions -> Manage Extensions in the Visual Studio 2022 menu bar. This will open the Manage Extensions dialog window.
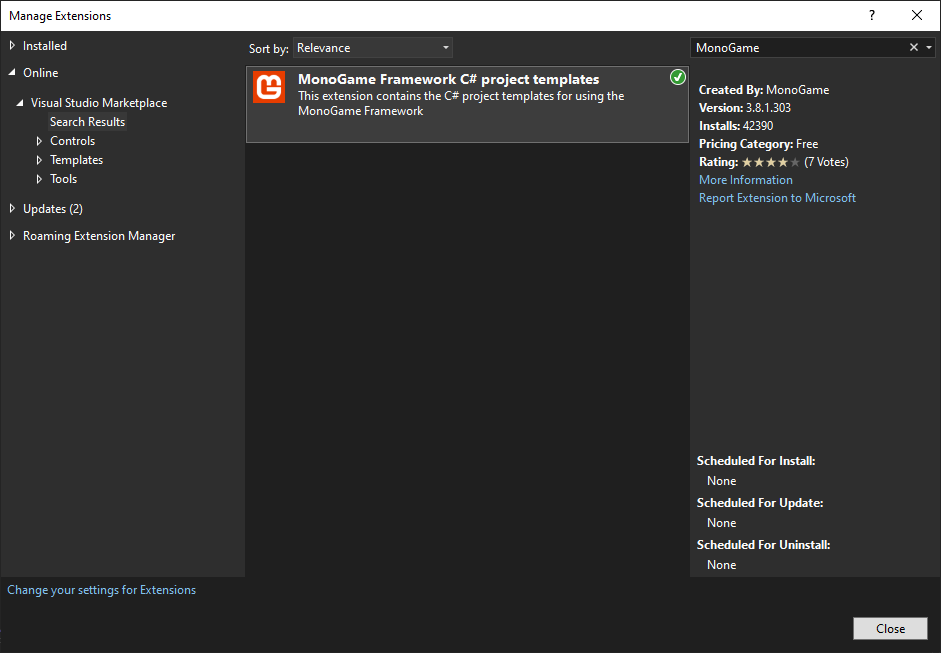
- Use the search box in the top-right corner of the Manage Extensions dialog window to search for MonoGame, then click the MonoGame Framework C# project templates extension as shown below and download it to install it.
After it is downloaded, an alert will appear at the bottom of the Manage Extensions window that states "Your changes will be scheduled. The modifications will begin when all Microsoft Visual Studio windows are closed." Click the Close button, then close Visual Studio 2022.
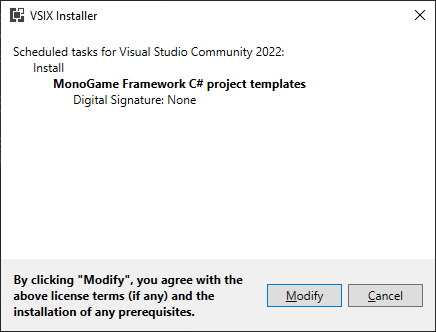
After closing Visual Studio 2022, a VSIX Installer window will open confirming that you want to install the MonoGame Framework C# project templates extension. Click the Modify button to accept the install.
You now have the MonoGame templates installed and are ready to create new projects.
Next up: Creating a new project
[Alternative] Install the .NET 6 SDK (compatible with JetBrains Rider and Visual Studio Code)
If you prefer to use JetBrains Rider or Visual Studio Code, and after installing either of them, you will also need to install the .NET 6 SDK.
Once the .NET 6 SDK is installed, you can open a Command Prompt and install the MonoGame templates by typing the following command:
dotnet new --install MonoGame.Templates.CSharp
Next up: Creating a new project